This tutorial covers setting up a full LAMP (Linux, Apache, MySQL, PHP) web stack, including HTTP server, MySQL database, and PHP for app logic.
This is commonly called a LAMP server – Linux, Apache, MySQL, PHP.
Linux rules the web server world – the operating system powers the vast majority of web servers worldwide.
Apache is a popular web server – the software with which web browsers connect to receive content.
MySQL is a popular database server – it stores information in rows and columns inside tables. There is also a drop-in replacement called MariaDB, which offers compatible functionality.
Finally, PHP is a programming language commonly used in web development. It lets you write application logic, which then generates web pages.
Apache runs on Linux, serving content generated by PHP, which stores user data in MySQL databases.
Here’s how to set it all up and get it working together.
Installing Ubuntu Linux
First up, the Linux bit. You’ll need to install Ubuntu Linux for this tutorial. 20.04 is the latest release with Long Term Support recommended for servers. Ubuntu was chosen as it is popular, stable, and its software repositories already contain everything needed.
You can download the Server or Desktop variations – either will work for setting up a LAMP server, which you choose depends on whether you plan on using it for local development on a desktop computer with a GUI and development tools or whether you’re deploying a server which will live in the cupboard, or on a cloud host.
Here’s how to Install Ubuntu Desktop
And Here’s How To Install Ubuntu MATE on a Raspberry Pi
If you’re deploying Ubuntu Server to a cloud host, the OS install is taken care of for you.
Once you’ve got Ubuntu installed, make sure it’s up-to-date by running the following commands in succession:
sudo apt update
sudo apt upgrade
Setting a Static IP
Setting up Remote Access with SSH
Whether you’re developing on a local machine with a desktop or on a headless server in the cloud, remote access will come in useful. Most cloud-hosted servers will already be set up with SSH and a user account. If not, here’s how to install it:
sudo apt install openssh-server
Setting up the Firewall with UFW
UFW (Uncomplicated Firewall) is a simple firewall that will help keep your server safe. Leaving a server wide-open to internet traffic is a certified bad idea. Even if you are running a server on your home network, it’s a good idea to have a firewall set up so you’re familiar with the process.
Install UFW:
sudo apt install ufw
Allow SSH through the firewall:
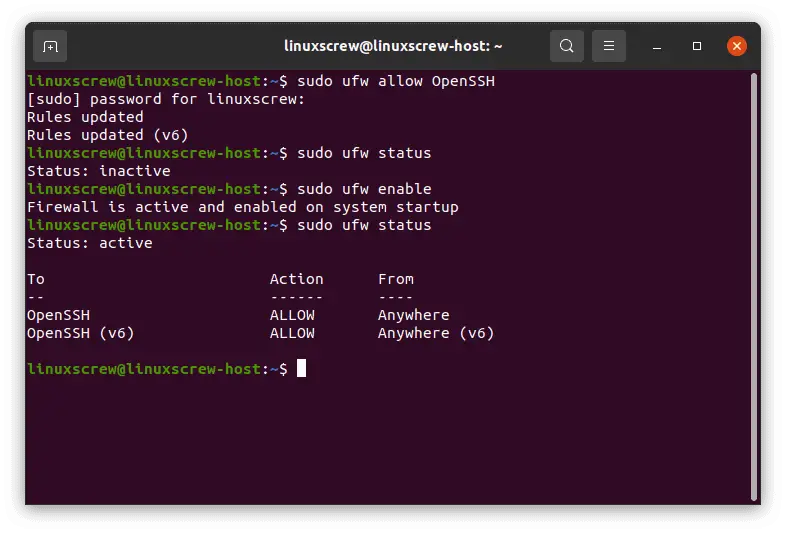
sudo ufw allow OpenSSH
This will allow both incoming and outgoing traffic to SSH from the server while the firewall is enabled. Enable the firewall by running:
sudo ufw enable
Don’t enable the firewall until you’ve allowed SSH through! Otherwise, you might block your own remote session and be forever locked out!
Preventing Brute-Force Attacks with Fail2ban
Fail2ban blocks all internet traffic from IP addresses, which repeatedly fail to log in to services running on your server (Like SSH, Apache, and Mysql). It’s a good start to securing your internet-facing Linux computers but is not a stop-all – it just helps prevent automated attacks.
Once installed, it’ll do its thing without any further configuration:
sudo apt install fail2ban
Installing the Apache Web Server
To install the Apache Web Server, run:
sudo apt install apache2
Apache will be installed and set to automatically start on boot.
Allow Apache Through the Firewall
Apache is a web server, so it will also need to be allowed through the firewall. You can list the available firewall profiles by running:
sudo ufw app list
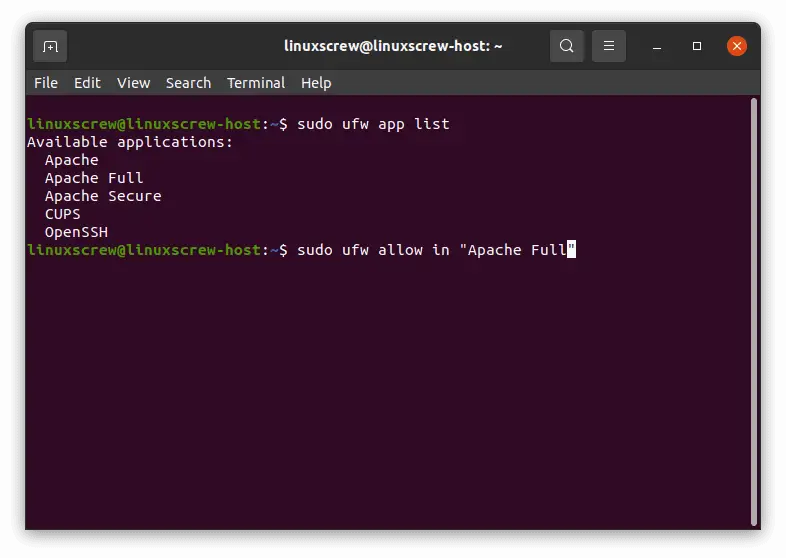
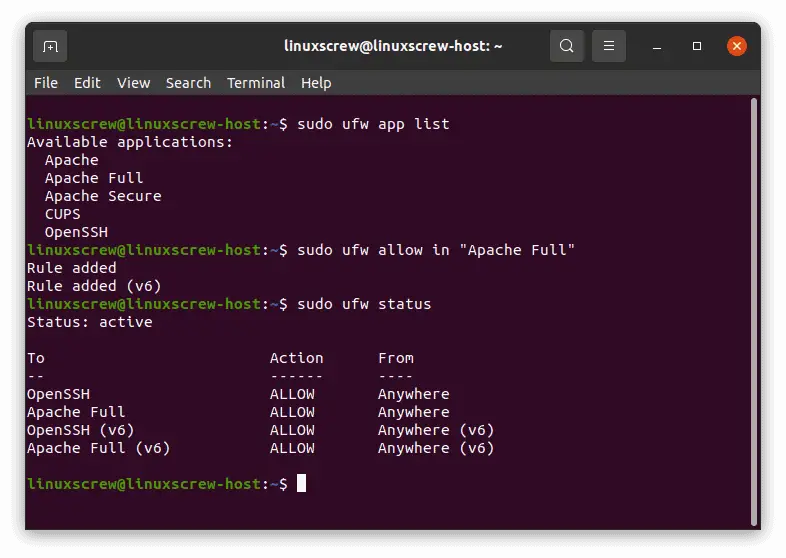
sudo ufw allow in "Apache Full"
Check the status to make sure Apache is allowed by running:
sudo ufw status
Checking Apache is Running
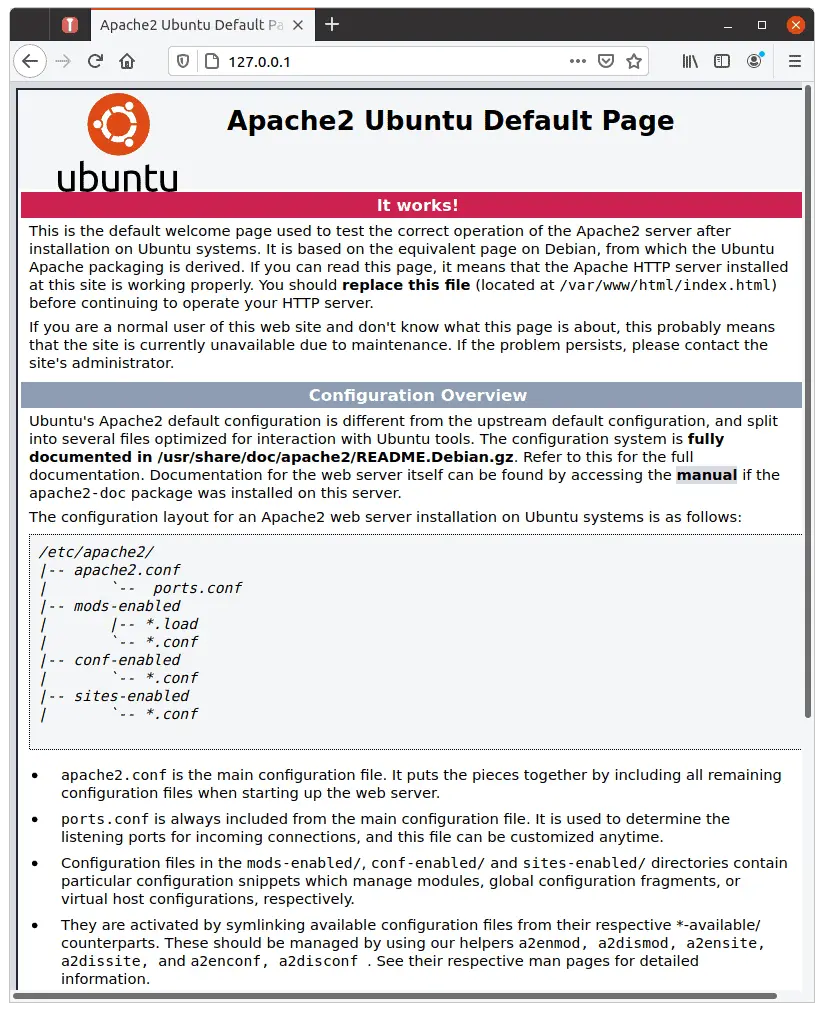
If you’re setting up LAMP on a desktop computer with a web browser, navigate to
127.0.0.1
In your browser – you should see the below page confirming Apache is up and running:
127.0.0.1 is the address for localhost – it’s the address that a computer uses to access itself on a network.
If you are on a different computer, you can connect using your LAMP server’s IP address – there’s a link further up in this article about setting a static IP address.
Apache’s Web Files
By default, apache stores the HTML (and soon PHP) files that run your website at:
/var/www/html
Installing the MySQL Database Server
Next up, install the MySQL server:
sudo apt install mysql-server
Like Apache, it will be set to start automatically on boot.
Secure MySQL
MySQL should be secured before you continue. There’s a built-in tool that will do all of this for you, which can be run by entering:
sudo mysql_secure_installation
You’ll be asked some questions about how you want MySQL secured:
Would you like to setup VALIDATE PASSWORD component?
Yes – enforcing some password complexity will make the system more secure.
You’ll then be prompted to set password complexity and enter a new password for the MySQL root (administrator) user. The MySQL root user is completely separate from the Linux root user.
Remove anonymous users?
Also, answer yes – the default anonymous users do not have passwords, which is insecure.
Disallow root login remotely?
Again, answer yes. There is no need for remote users to perform administrative tasks on MySQL.
We will also not be allowing MySQL through the firewall. It will be accessible from within the server but not externally. There’s no need for it to be.
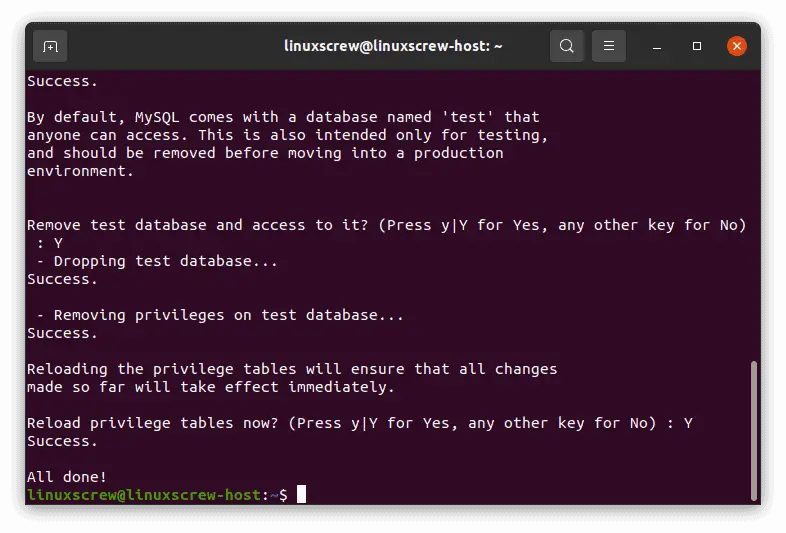
Remove test database and access to it?
Yes.
Reload privilege table now?
Answer yes to complete securing the server and reload the remaining users’ privileges.
Check MySQL is Running
To confirm that MySQL is running run:
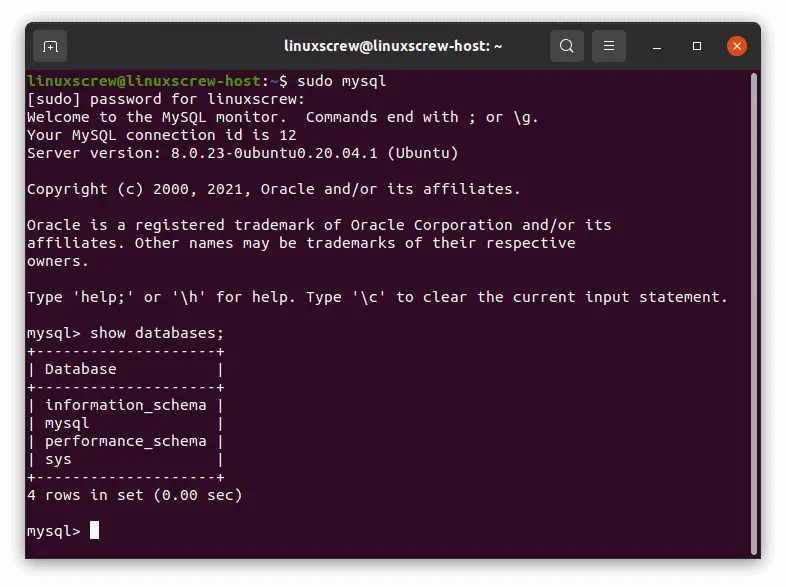
sudo mysql
When the MySQL command is run as root (or using sudo), it automatically tries to connect to the local server as the root user.
If this succeeds, run the following to list the databases present to confirm everything works correctly:
SHOW DATABASES;
Type:
exit;
To exit the MySQL command line.
Installing PHP
Install PHP with the following familiar-looking command:
sudo apt install php
Check PHP is Installed
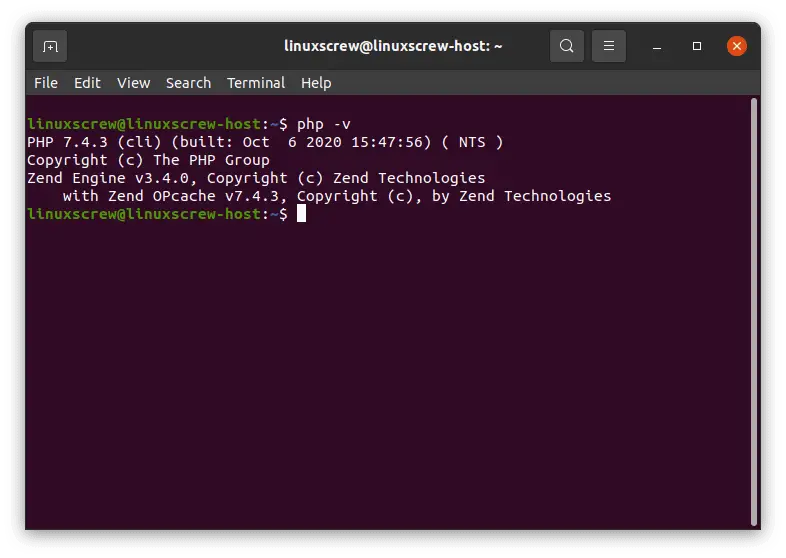
To check PHP has installed successfully, run:
php -v
Install PHP Modules
PHP needs to be able to talk with Apache and Mysql. For this to happen, Apache needs its PHP module installed, and PHP needs its MySQL module installed:
sudo apt install libapache2-mod-php php-mysql
These Apache and PHP modules will be enabled automatically once installed.
Checking phpinfo()
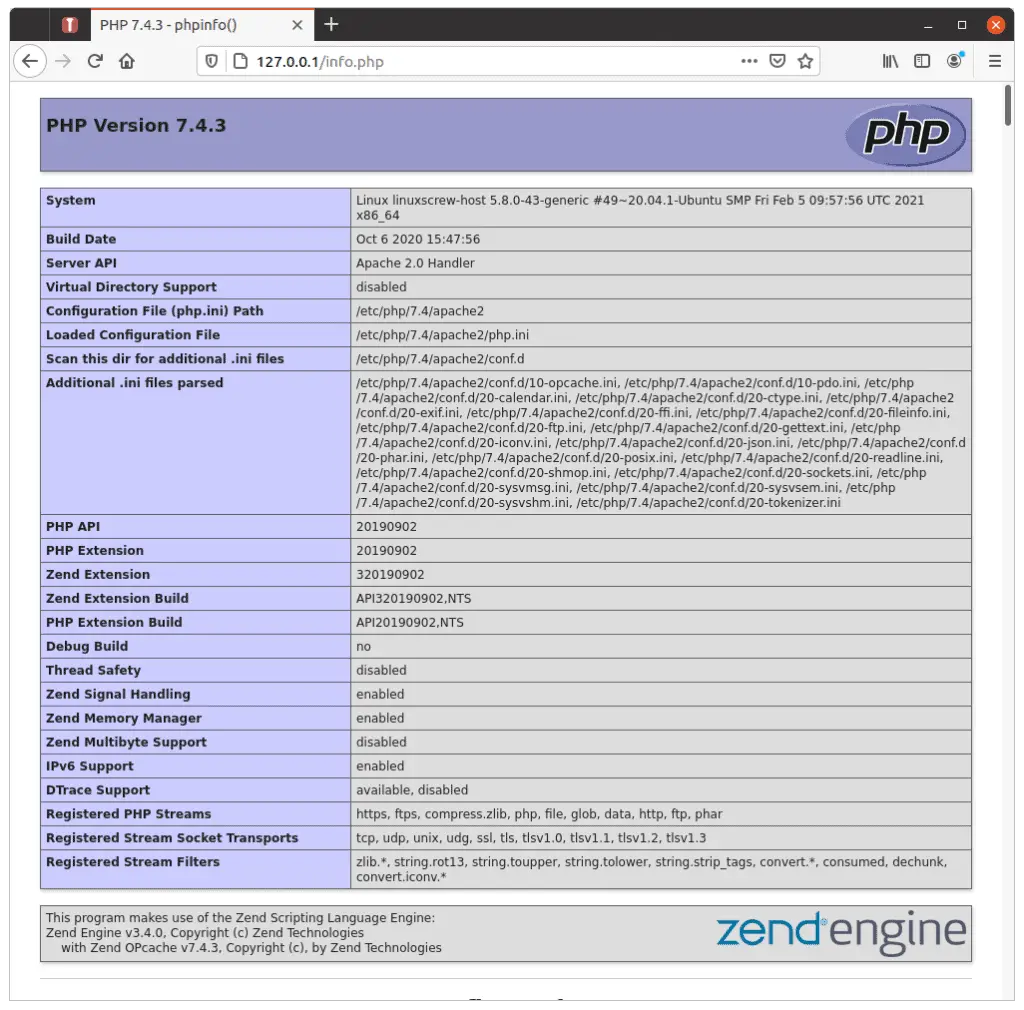
phpinfo() is a PHP function that outputs all of your PHP environment details, including configuration and which modules are enabled. It’s a good way to check that Apache and PHP are configured.
Create a new PHP file to run this in the Apache HTML directory, which holds the files your web server serves:
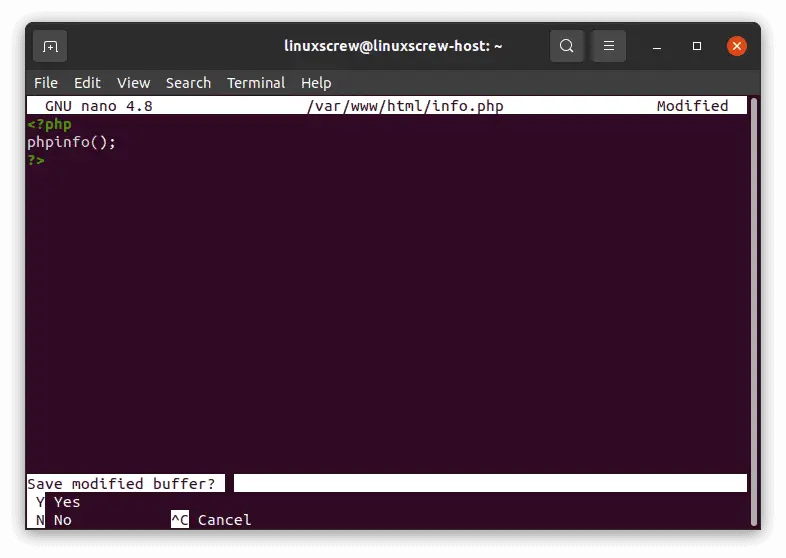
sudo nano /var/www/html/info.php
This will open the nano text editor with an empty file called info.php. Enter the code:
<?php
phpinfo();
?>
And press CTRL + X to save and quit and Y to confirm.
If you navigate to /info.php on your new LAMP server, you should see the following:
Testing it All Together
Everything that makes a LAMP server a LAMP server is now installed. Congratulations!
To confirm that everything is working as it should be, ready to start hosting existing apps or developing new ones, here are some steps for building a test PHP script that reads from a MySQL database.
Creating a Database and User
Open the MySQL command line as the root user:
sudo mysql
Create a database called db_example:
CREATE DATABASE db_example;
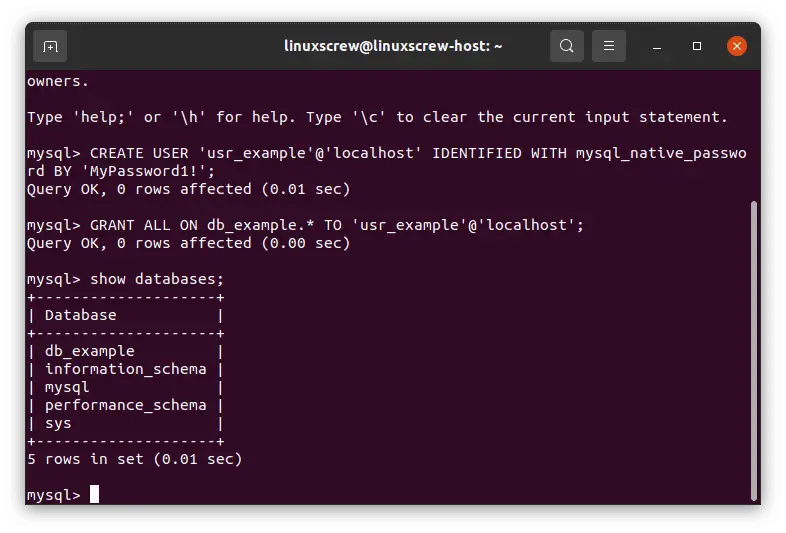
Next, a user is created with the username usr_example, which will have access from localhost using the supplied password:
CREATE USER 'usr_example'@'localhost' IDENTIFIED WITH mysql_native_password BY 'MyPassword1!';
With the database and user-created, grant the user ALL privileges for that database:
GRANT ALL ON db_example.* TO 'usr_example'@'localhost';
You can confirm that the database was created by running:
SHOW DATABASES;
Create a Table and Records
The database and user with access rights to the database are ready to go – now we need to create a table with some data in it to test with.
Switch to the db_example database by running:
USE db_example;
You must switch to the database before creating tables – otherwise, MySQL won’t know which database to put the table in.
Create a table called fruit – it will be created in db_example:
CREATE TABLE fruit (id INT AUTO_INCREMENT, name VARCHAR(255), PRIMARY KEY(id));
The line above tells MySQL to create a fruit table with two columns – id and name.
id is an INTeger column that will auto-increment – each record will have a unique id number, which is an increment of 1 over the previous.
name is a VARCHAR column, which is a short string with a maximum length given as 255 characters.
The final part of the statement tells MySQL that the primary key will be the id column. The primary key is the column used to uniquely identify each record.
You’ve probably noticed that I capitalize all MySQL commands in the above statements – this is optional, but it is a convention as it makes it easy to see what words are MySQL statements and what words refer to table names, etc.
Now, insert some test data. A list of fruit! Only the name needs to be supplied – the id column is calculated and entered automatically:
INSERT INTO fruit(name) VALUES ('apples'), ('bananas'), ('pears'), ('grapes');
Whenever MySQL does something right, you’ll get a response with:
Query OK
And whenever something goes wrong, you’ll get an error.
Check the records were entered correctly into the fruit table by running:
SELECT * from fruit;
exit;
PHP Script to Read Database, Table, and Records
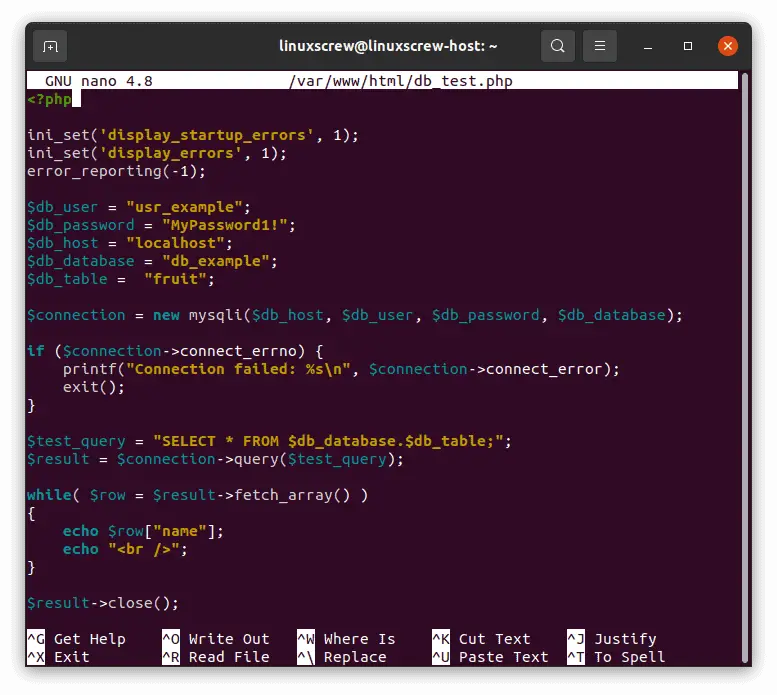
Use the nano text editor to create a new PHP file to list the contents of the fruit table we just created in the db_example database:
sudo nano /var/www/html/db_test.php
And enter the following code:
<?php

ini_set('display_startup_errors', 1);
ini_set('display_errors', 1);
error_reporting(-1);

$db_user = "usr_example";
$db_password = "MyPassword1!";
$db_host = "localhost";
$db_database = "db_example";
$db_table =  "fruit";

$connection = new mysqli($db_host, $db_user, $db_password, $db_database);

if ($connection->connect_errno) {
    printf("Connection failed: %s\n", $connection->connect_error);
    exit();
}

$test_query = "SELECT * FROM $db_database.$db_table;";
$result = $connection->query($test_query);

while( $row = $result->fetch_array() )
{
    echo $row["name"];
    echo "<br />";
}

$result->close();
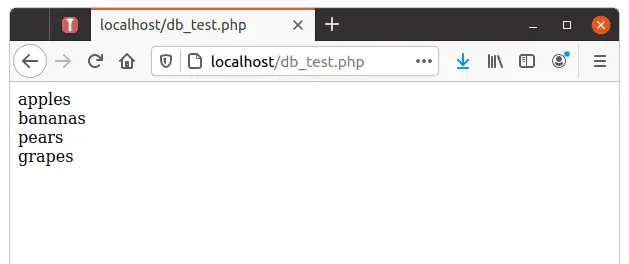
Save it by pressing CTRL + X and Y to confirm, then point your web browser to /db_test.php on your new LAMP server:
Looks good! All of the components of your LAMP server are working together!
Real-World Usage for your LAMP Server.
Linux, Apache, MySQL, and PHP are all versatile tools. You can build pretty much whatever you want on this platform. There are hordes of helpers, libraries, tutorials, articles, and helpful people on the Internet ready to help you start building your next project.
PHP Frameworks are useful for providing the foundation of a project if you want a leg up rather than starting from scratch.
WordPress provides a blogging platform that can be extended with thousands of themes and packages that add functionality from online stores to social network functionality. It works out of the box and can be extended with your own code if you’re feeling adventurous.
Laravel provides a bare framework for building literally anything – APIs, chat apps, online calendars, doorbells, whatever you can think of.



Wow. Great article. Just what I needed. Thanks for sharing your knowledge!
Hello, I came across a pretty challenging error (for a noob like myself) when following the turorial ‘Setting up a LMAP Stack on Ubuntu 20.04 (And Raspberry Pi)’ that I felt might be worth pointing out.
All info pertains to section 5 ‘Testing it All Together’. This is my first write-up, so please bear with me. I will try to detail what I encountered, as well as my simple solution.
Overview:
Following the tutorial as written results in an error: ‘No database selected’ – the next logical step is to select that database and continue, which results in the provided script throwing a fatal error.
System:
MySQL Ver 8.0.26-0ubuntu0.20.04.3 for Linux on x86_64 ((Ubuntu))
PHP 7.4.3 (cli)
Zend Engine v3.4.0
Apache/2.4.41 (Ubuntu)
Details:
* Section 5.1 Creating a Database and User *
[Step 1] CREATE DATABASE db_example;
[Step 2] CREATE USER ‘usr_example’@’localhost’ IDENTIFIED WITH mysql_native_password BY ‘MyPassword1!’;
[Step 3] GRANT ALL ON db_example TO ‘usr_example’@’localhost’;
*** This is where I encounter my issue. ***
Running this command results in: ‘ERROR 1046 (3D000): No database selected
I ran the command ‘USE db_example;’ then re-ran the command from [Step 3].
I followed the remaining steps in Sections 5.2 and 5.3 which resulted in an error displayed when visiting ‘localhost/db_test.php’ with a browser:
Fatal error: Uncaught Error: Call to a member function fetch_array() on bool in /var/www/html/db_test.php:17 Stack trace: #0 {main} thrown in /var/www/html/db_test.php on line 17
After some blind troubleshooting I discovered the issue – Because I had selected the database with ‘USE db_example;’ and then re-ran the command from [Step 3] I had granted ‘usr_example’ ALL permissions to ‘db_example.db_example’
I revoked the incorrect permission, and ran ‘GRANT ALL ON db_example.* to ‘usr_example’@’localhost’; ‘
This granted me ALL privileges on ‘db_example.*’ and the script was returning the correct data.
Hopefully this can help someone if they encounter the same issue. Happy tinkering!
– BuddhaHead
Nice diagnosis and fix! There was a typo in my MySQL query which may have contributed to this, which is now fixed 🙂
Thanks for the update!