This tutorial will show you how to configure a privacy Vpn using OpenVPN on OpenWrt through the LuCI web interface (no command line required!). Lots of screenshots are included so that you can follow along.
What is OpenWrt
OpenWrt is a popular Linux distribution for routers and other low power devices. It makes a perfect host for a VPN gateway.
What is a Privacy VPN/ What is OpenVPN?
A VPN (Virtual Private Network) provides an encrypted connection between two networks over the internet.
Traditionally this was used for connecting remote business networks (eg. two offices in different states), but now it is more popular as a privacy tool – allowing you to route your internet traffic to another location so that your internet activity is more difficult for advertisers to track.
There are many privacy VPN products, and most of them support OpenVPN, an open source VPN server and client.
How to Set up OpenVPN on OpenWrt
Here’s how to configure OpenVpn on OpenWrt with the LuCI GUI Web interface.
Obtain an OpenVPN Configuration File
Your VPN provider will provide you with configuration files in the .ovpn format – you simply need to locate and download them from your VPN providers website.
I can’t be much more specific than that – the steps will depend on which VPN product you are subscribed to!
Install OpenVPN software on OpenWrt
Below are the steps for installing and configuring OpenVPN.
To get started, navigate to:
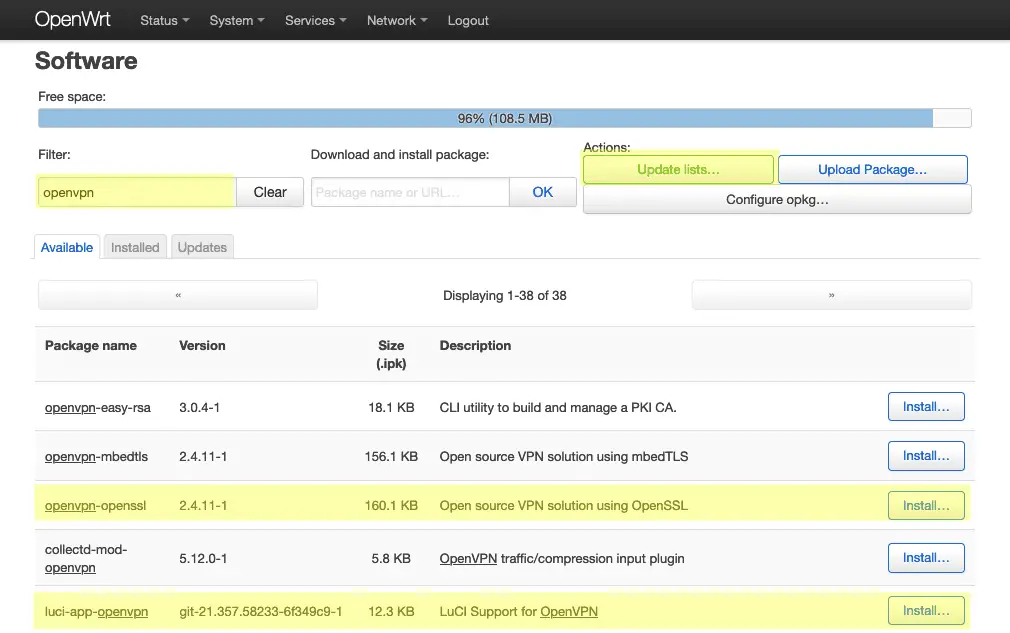
System->Software
…and click Update Lists to get a list of installable software.
Type ‘openvpn’ into the Filter box and then click the Install button next to the following packages:
openvpn-openssl
luci-app-openvpn
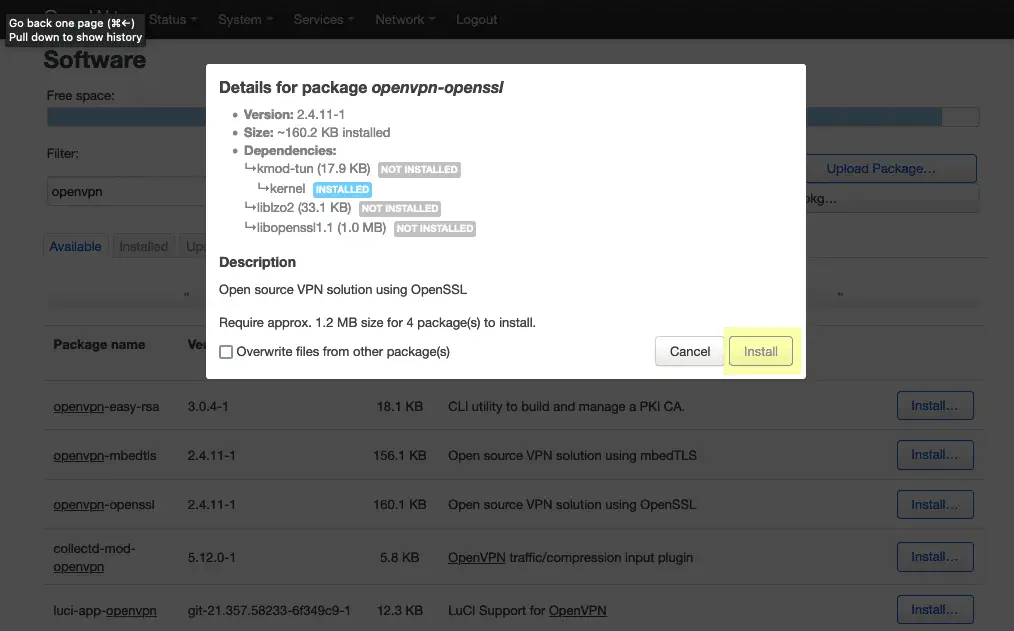
You’ll see a list of dependencies and an install button for each package, confirm each by clicking Install:
Configure OpenVPN
Navigate to:
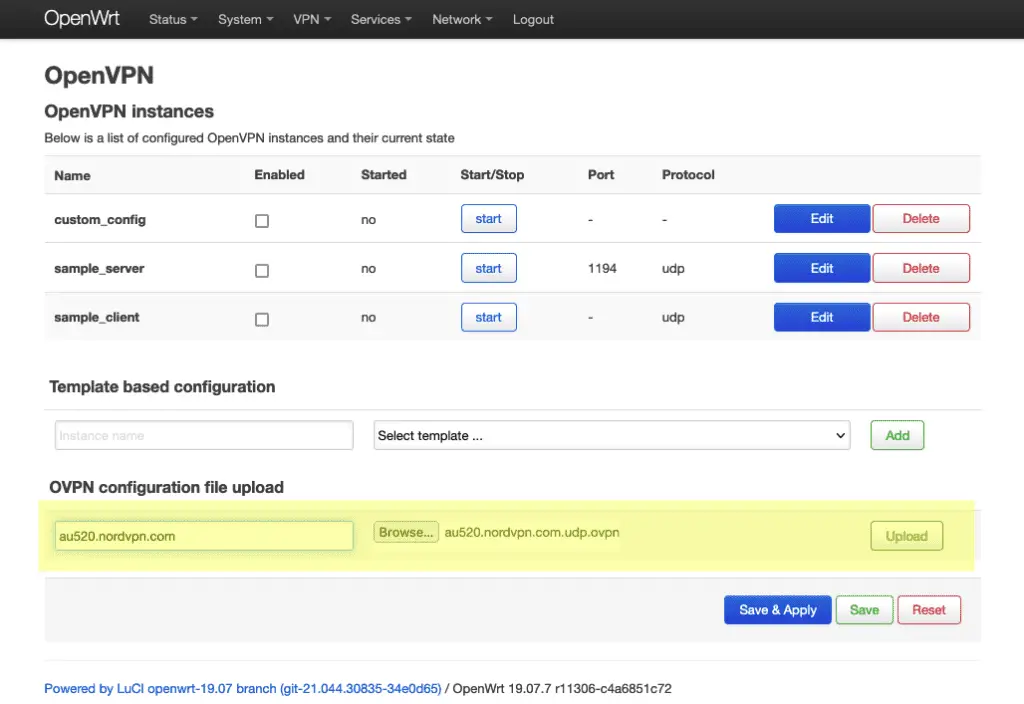
VPN->OpenVPN
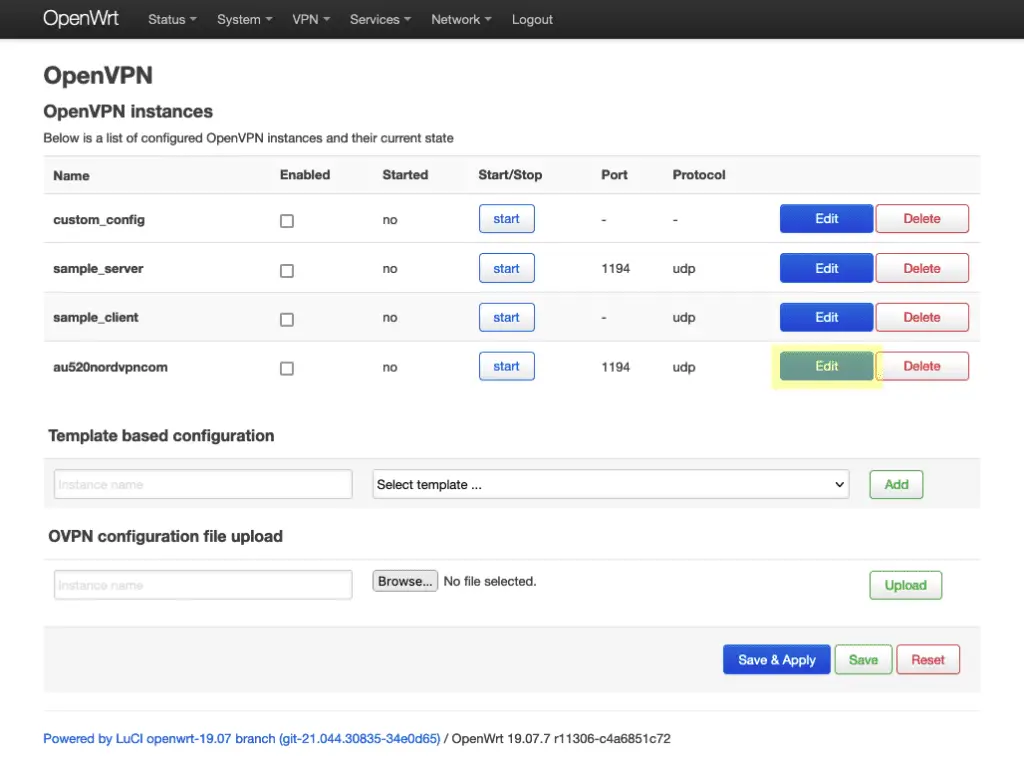
Browse for the .ovpn configuration file provided by your VPN service and give it a name. Click Upload to save the configuration file under that name.
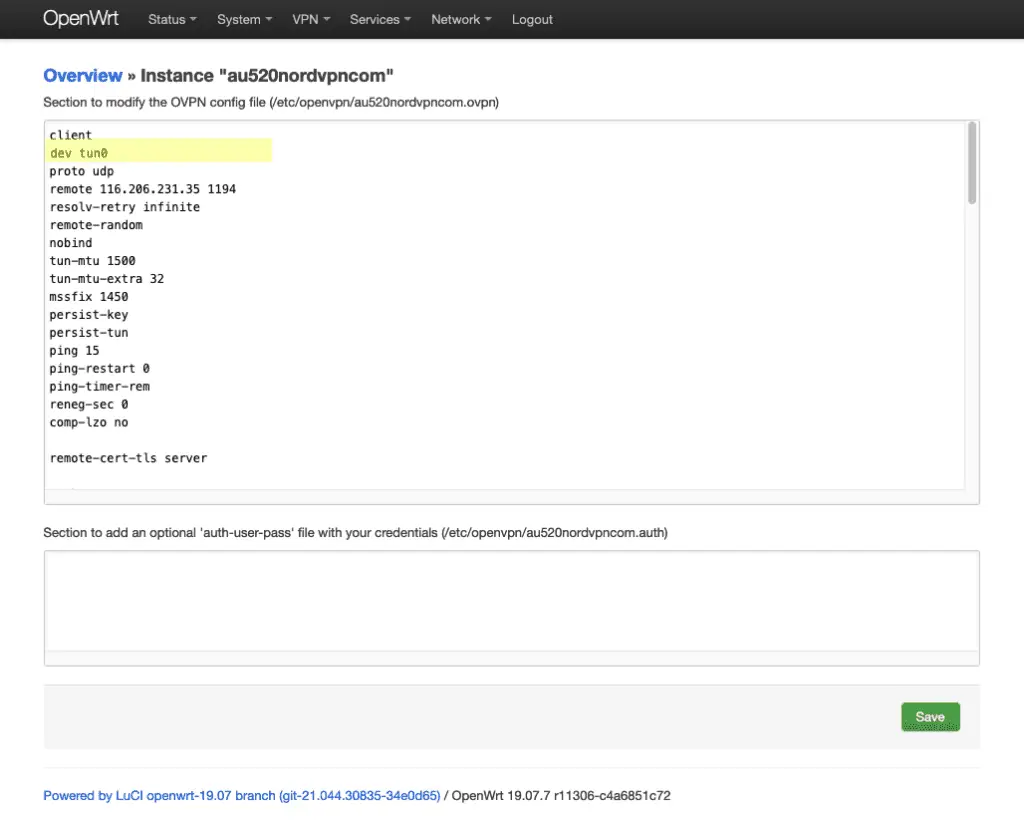
The uploaded configuration will now appear in the list – click Edit to edit the configuration, we need to make a few tweaks.
Change the dev entry from tun to tun0.
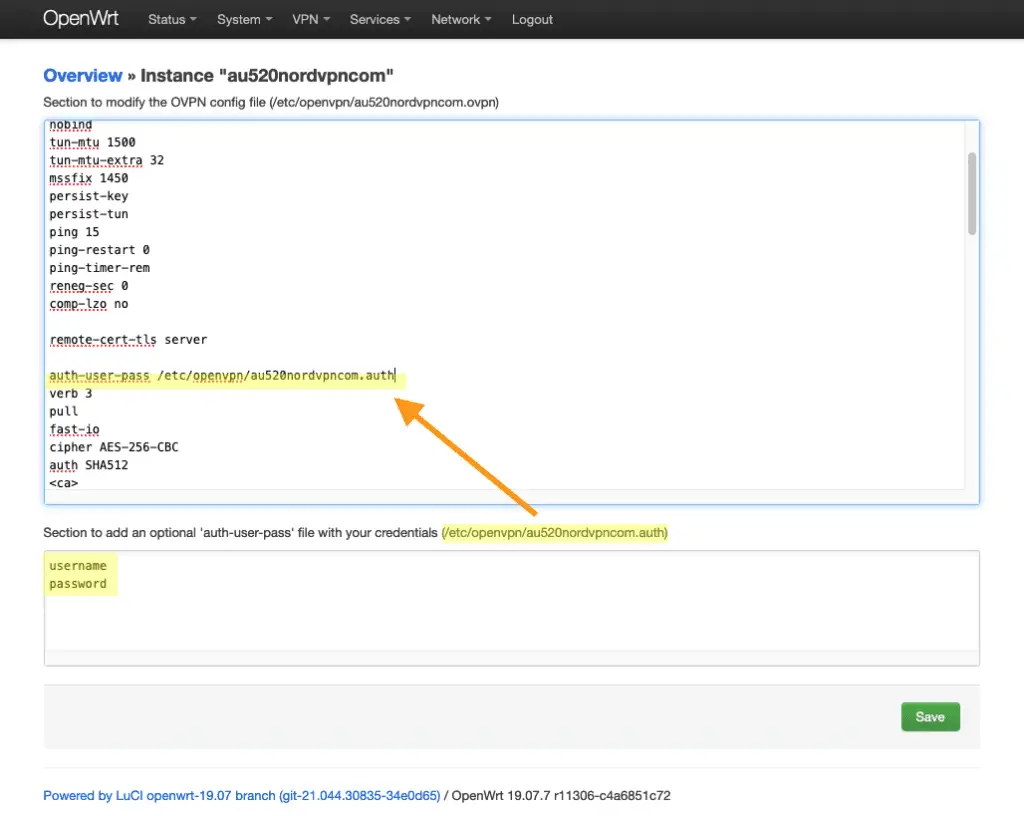
Then, scroll down to the auth-user-pass entry and append the path to the optiona; auth-user-pass file which is printed below.
Fill a username and password in the lower box to complete this step if user authentication is required for your VPN provider.
Click the Save button when you’re done. And then navigate back to the OpenVPN configuration screen.
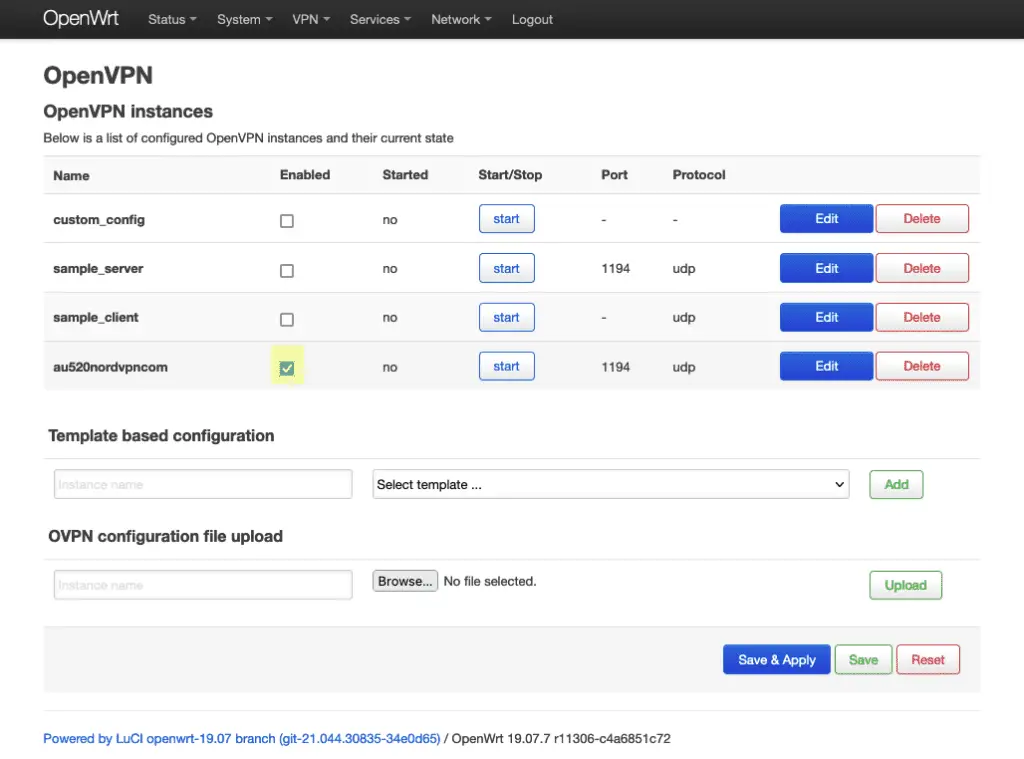
Enable the new VPN configuration buy checking the Enable checkbox.
Click Save and Apply when you’re ready to continue.
Configure Network Interface
Navigate to:
Network->Interfaces
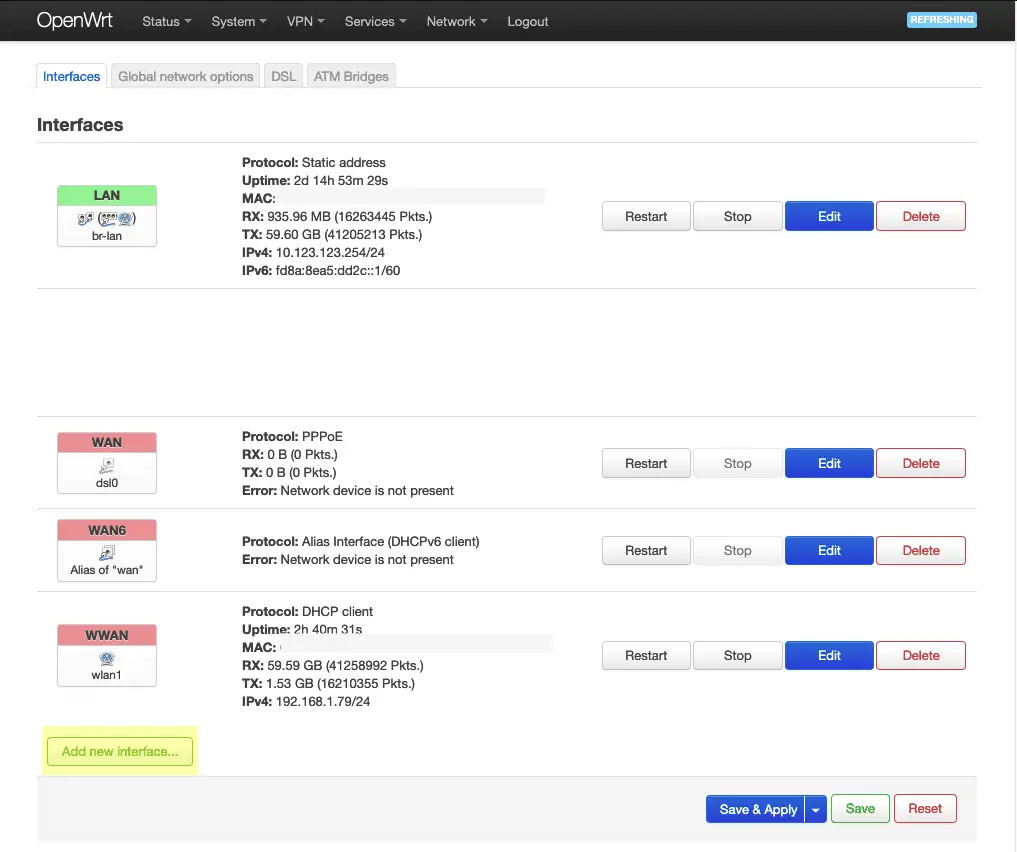
Click on Add new interface.
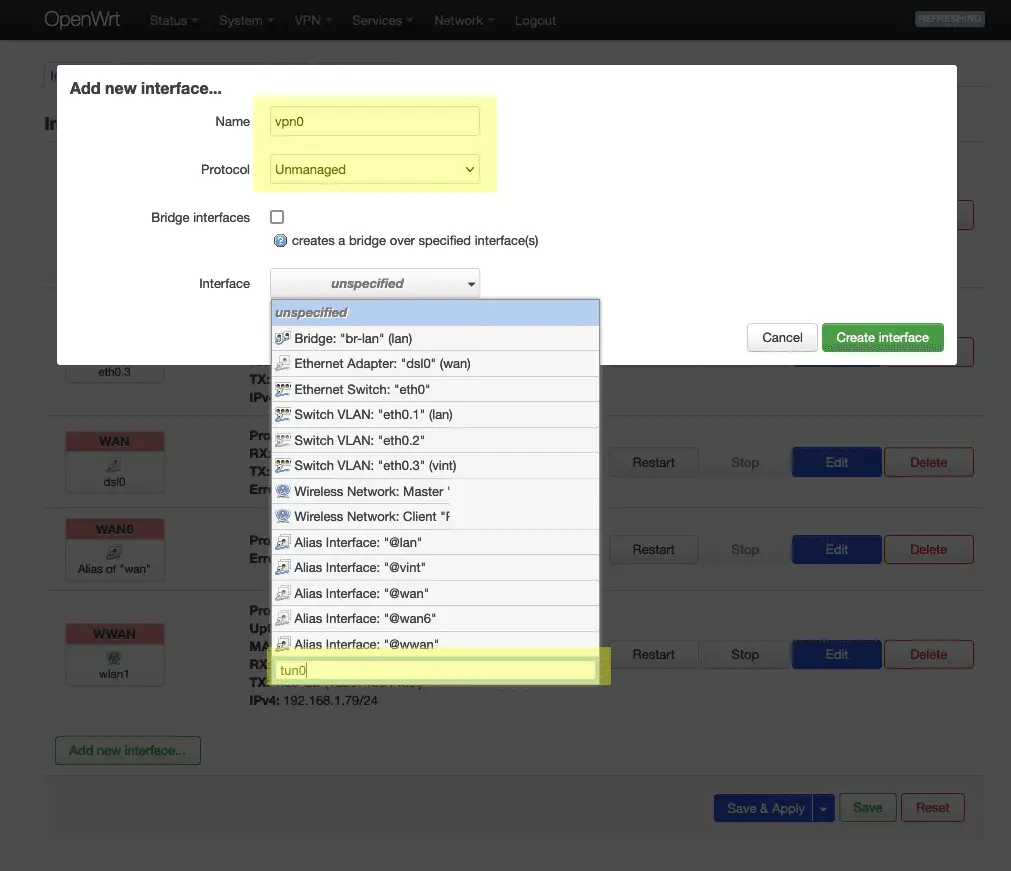
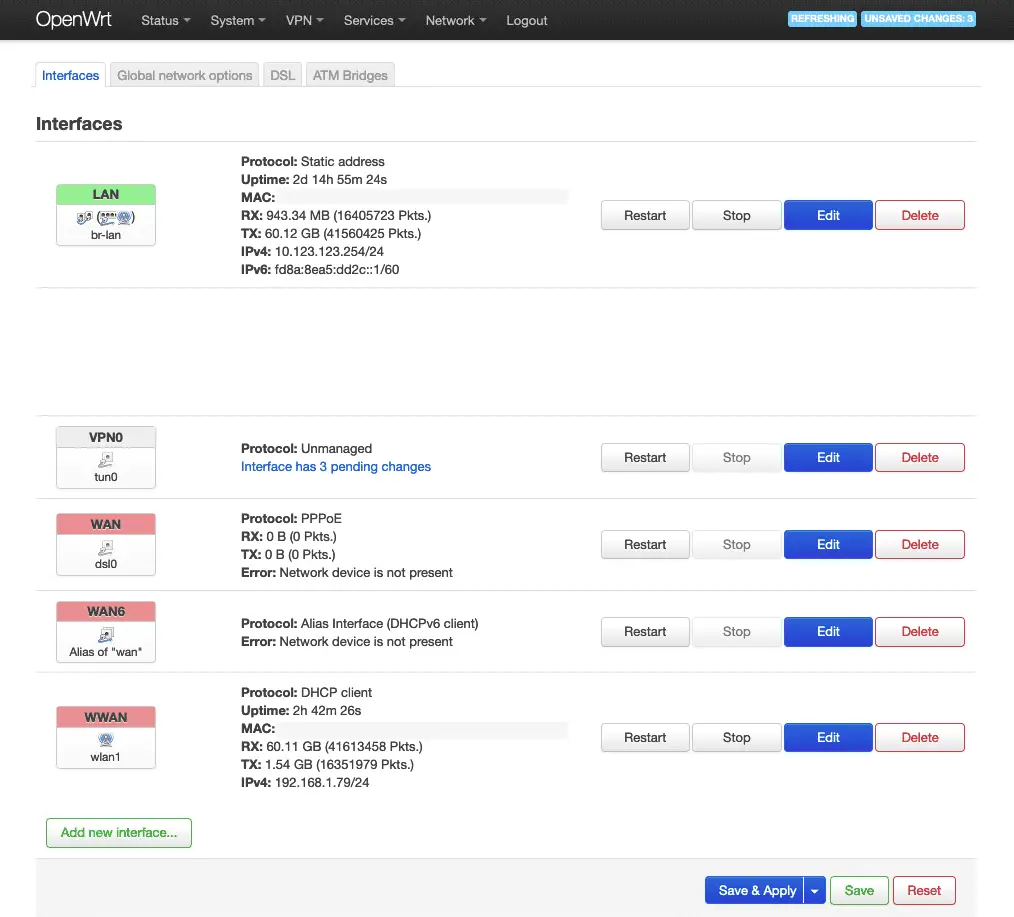
Fill out the Add new interface form as shown in the highlighted areas. I’ve named this interface VPN0. You will need to type in the interface name – it does not yet exist in the list.
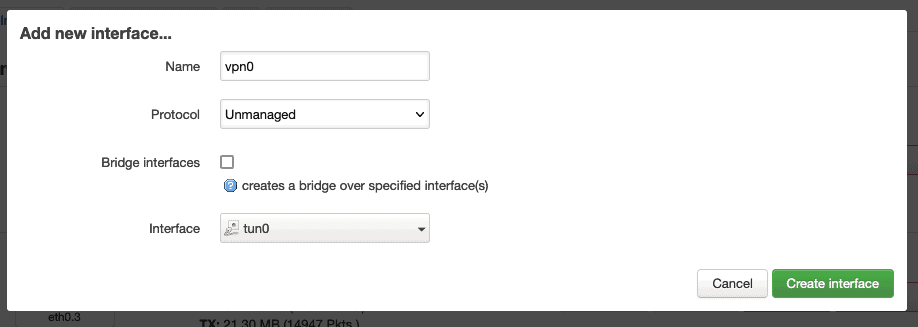
Here’s how the Add new interface form should look. Save it by clicking Create interface.
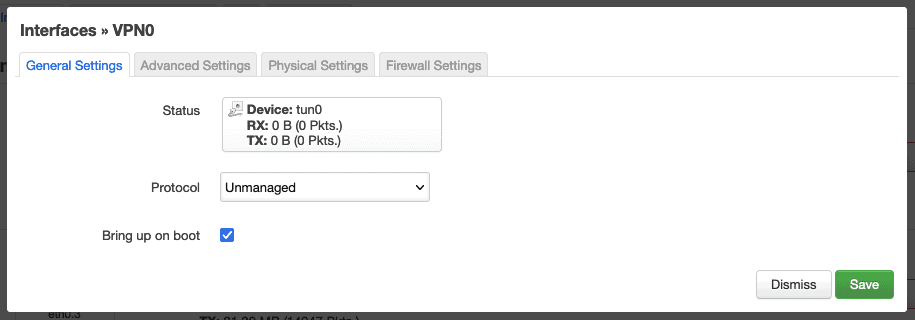
Click Dismiss after confirming the details of the created interface.
The VPN0 interface will now appear in the interface list.
Configuring the Firewall
Navigate to:
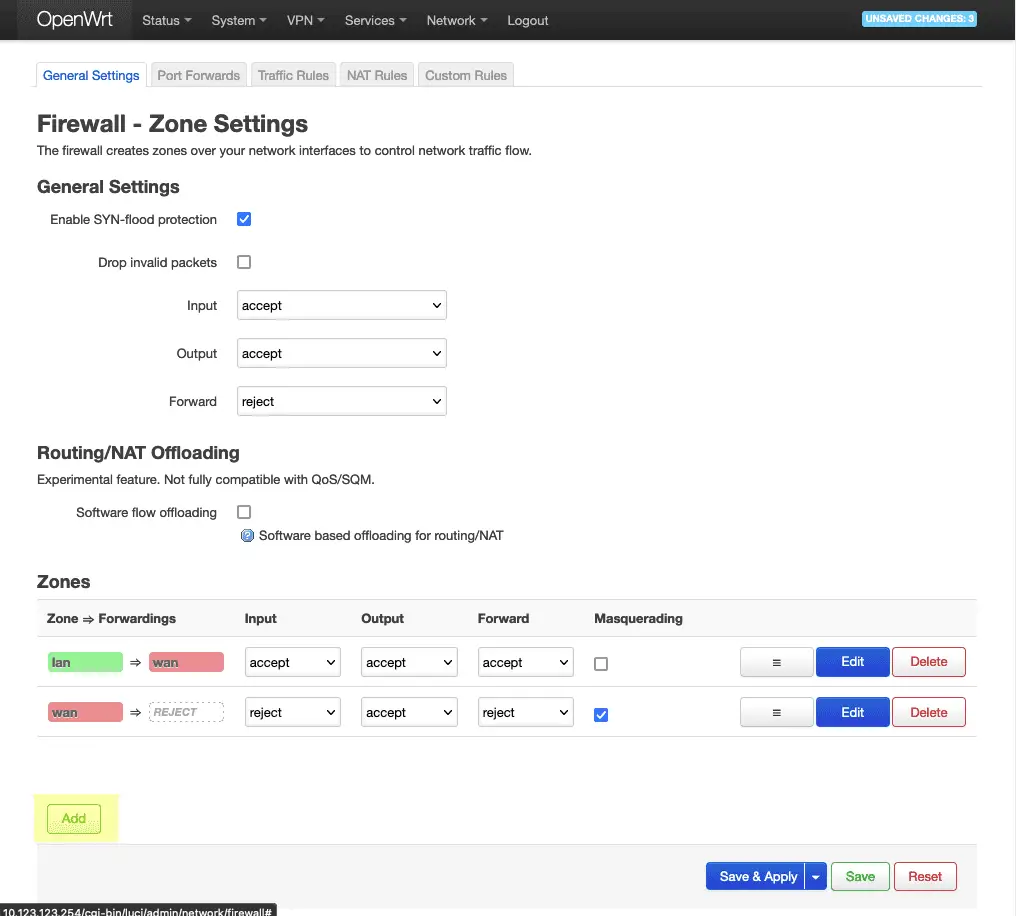
Network->Firewall
Click on the Add button under Zones.
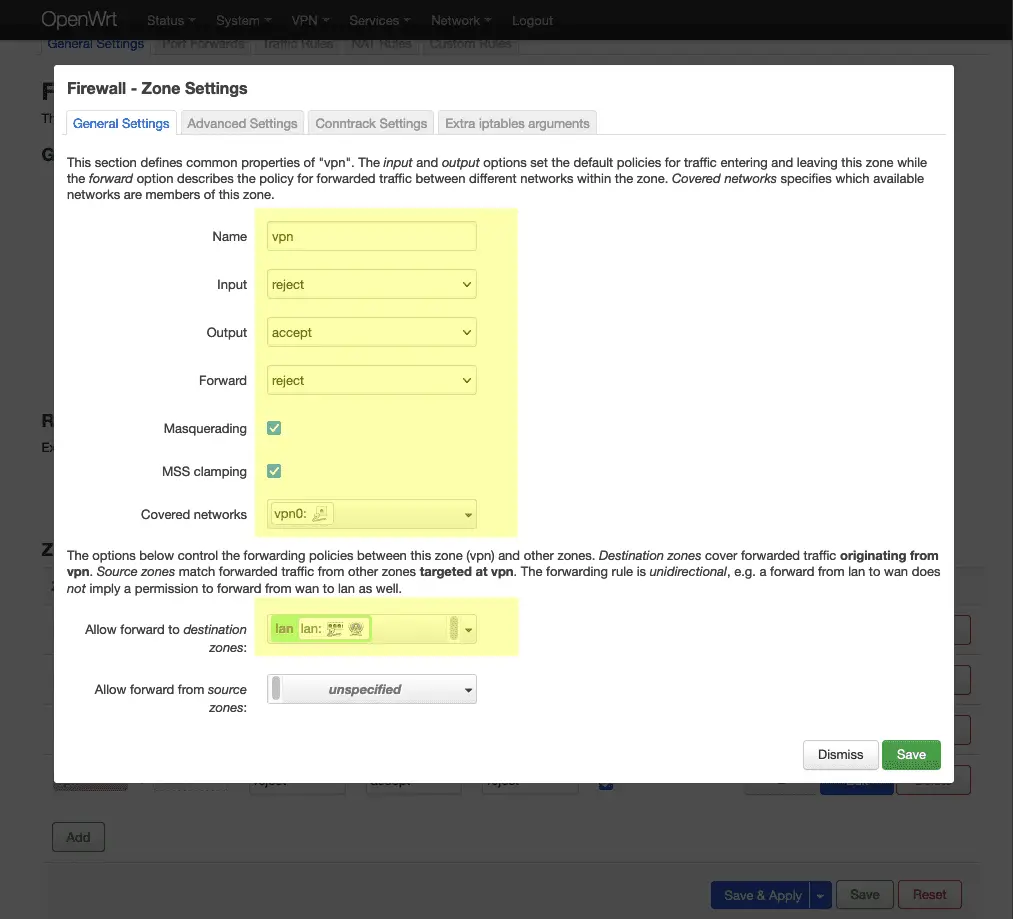
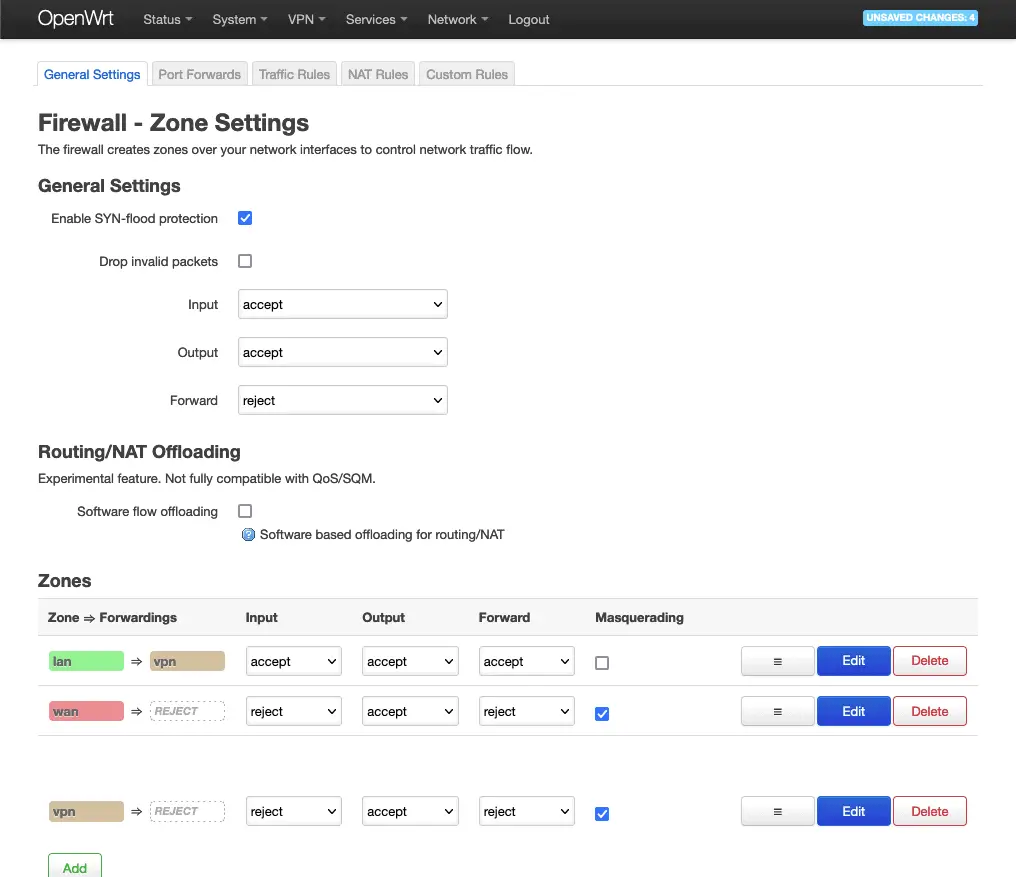
Fill out the settings for the new zone to match the above screenshot. I’ve simply named this zone vpn.
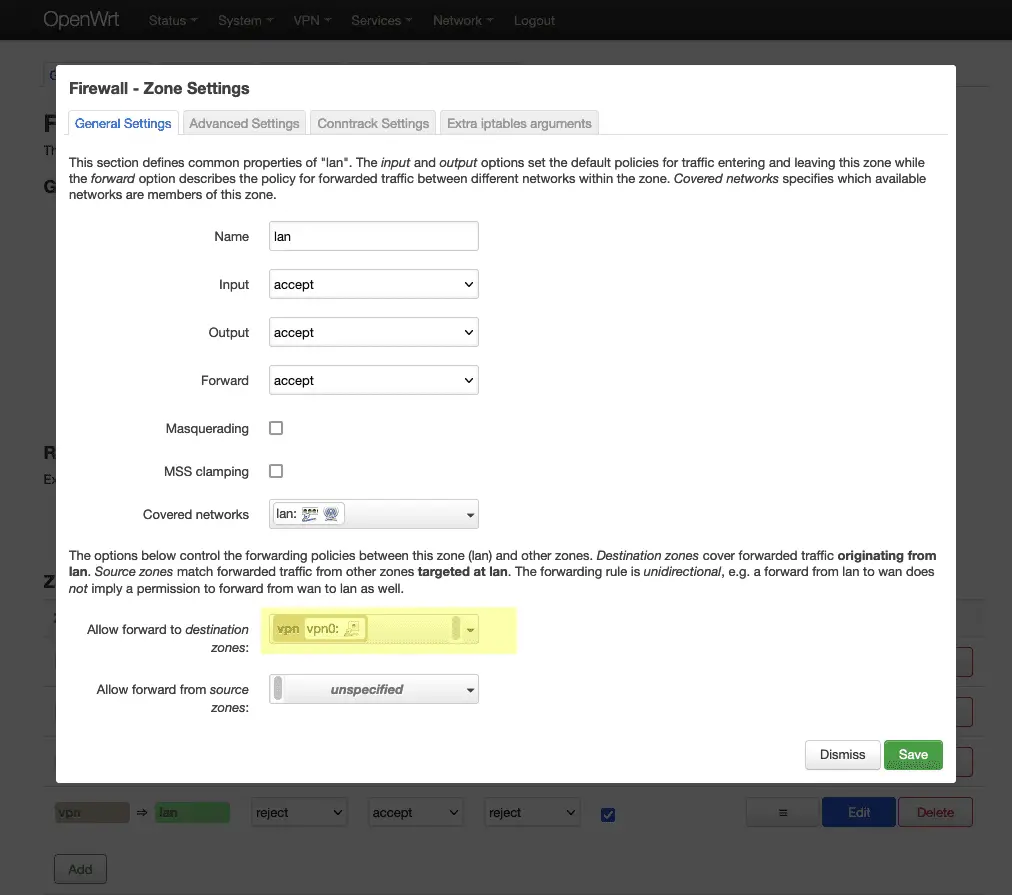
Click Save to return to the zones list and then edit the lan zone. By default, the lan zone will by default allow forwarding to the wan zone.
We will replace this with the vpn zone instead, replacing the internet connection provided by the wan network with the vpn network.
Set the lan zone form to match the above and save.
Your firewall screen should now look something like this – lan should forward to vpn.
Click Save & Apply to continue.
Configure DNS
Navigate to:
Network->DHCP and DNS
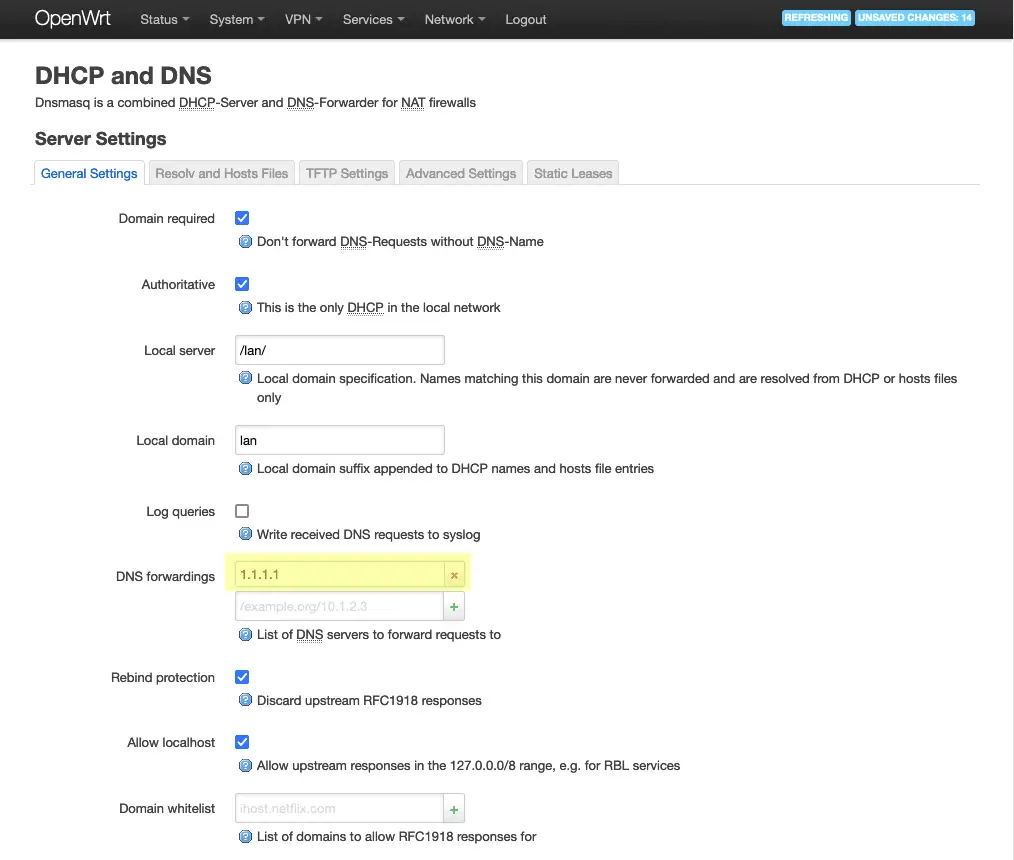
Update the address for DNS Fowardings. This should be the IP address of a DNS server provided by your VPN service so that all traffic, including DNS lookups, is contained within the VPN.
If your VPN provider doesn’t provide a DNS server, CloudFlare’s 1.1.1.1 DNS server can be used, but your traffic may not be fully hidden from your ISP.
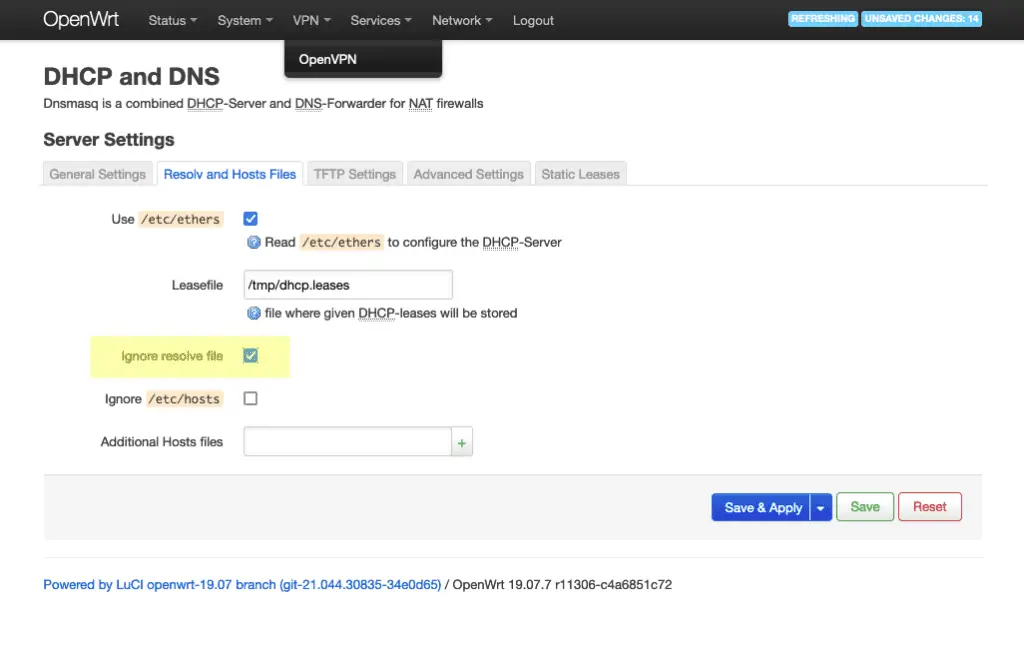
Next, click on the Resolv and host Files tab.
Check the Ignore resolve file box. Save & Apply to continue.
Reboot OpenWrt
Navigate to:
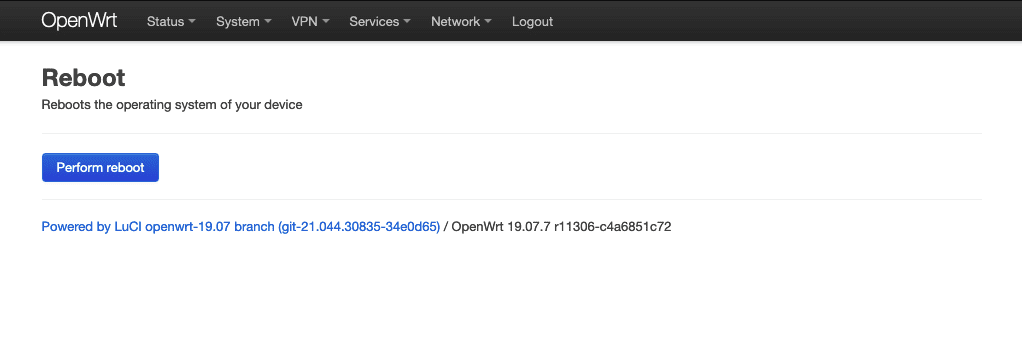
System->Reboot
Press the Perform reboot button to reboot the system, so we can be sure all changers are properly applied.
Testing OpenVPN Connection on OpenWrt
Navigate to:
Network->Diagnostics
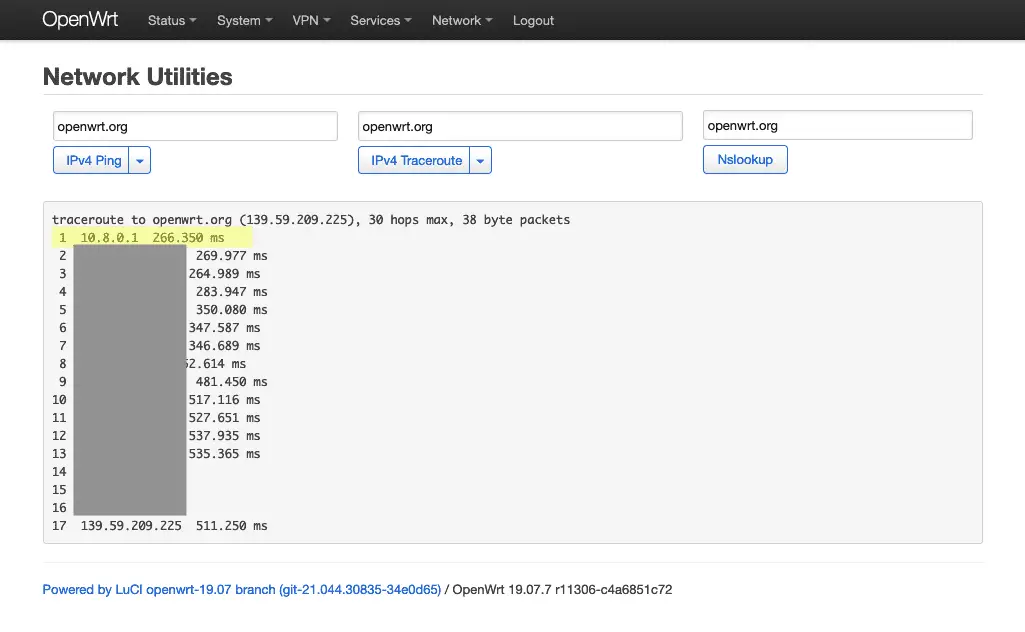
…and run an IPv4 Traceroute.
You’ll see the 10.8.0.1 first hop – this is not a public IP address – it’s the IP address of the VPN gateway, confirming the connection is working and that traffic is being correctly routed.
If I check my IP address online, I can also see that it has changed from my regular IP address (as has the location).
Everything seems to be working correctly!
Troubleshooting OpenVPN on OpenWrt
Sometimes things don’t quite work out, and the OpenVPN LuCI app doesn’t really tell you much if something goes wrong – in fact, it doesn’t even tell you something’s wrong at all.
If your connection isn’t working, head to
Status->System log
And scroll to the bottom – as OpenVPN retries the connection it will be outputting messages which describe any problems it is encountering.

