We’ve all been there (I’ve been there) – a file was deleted that shouldn’t have been. Here is how to attempt recovery on Ubuntu/Linux. with examples.
Backup Your Files
First up, keep backups of your files, and keep your backups up to date. The easiest way to recover a file is not to have to try to recover it at all – you can just go and retrieve it from your backup. No fuss. No stress. No praying.
How Deleted Files are Recovered
When a file is deleted, the reference to it is removed from the file system, but the raw data may still be readable on the disk using special tools.
Or at least, sometimes it stays readable on disk. Encryption, solid-state disks, and network volumes may not allow for the retrieval of deleted data, or the data may have been overwritten since it was deleted.
This means that trying to recover a deleted file is the last resort. It may not work, but you might get lucky. It’s the last resort because you forgot to backup or your backup wasn’t recent enough to include the deleted file, so.
Backup
It’s good for your long-term health. Stress kills. Losing important files causes stress. Backing up prevents the loss of important files.
Recovering Files using testdisk in Ubuntu and Linux
Installation
testdisk is a suite of file recovery tools for Linux. It’s in the Ubuntu software repositories, so you can install it by simply running:
sudo apt install testdisk
Once installed, you can launch it by running:
testdisk
…and view the user manual by running:
man testdisk
Run and Configure testdisk
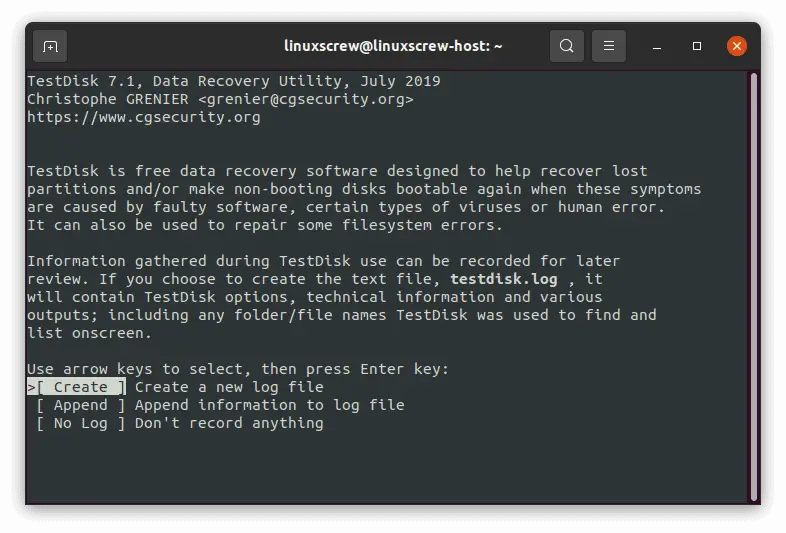
On running testdisk for the first time, you’ll need to create a log file, where all actions taken by testdisk will be recorded:
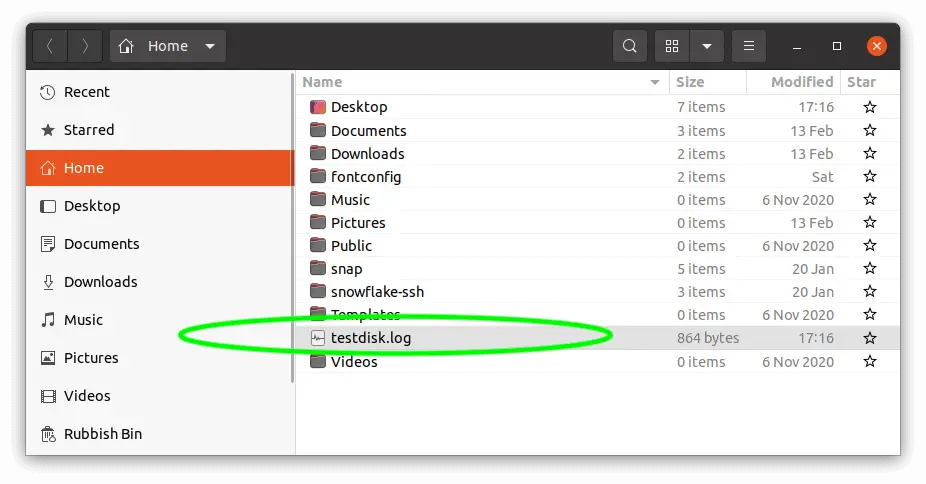
Select Create, and the log file will be created in your home directory with the name testdisk.log:
Pay attention to the instructions at the bottom of each screen in testdisk – they tell you the keys to select and navigate the application.
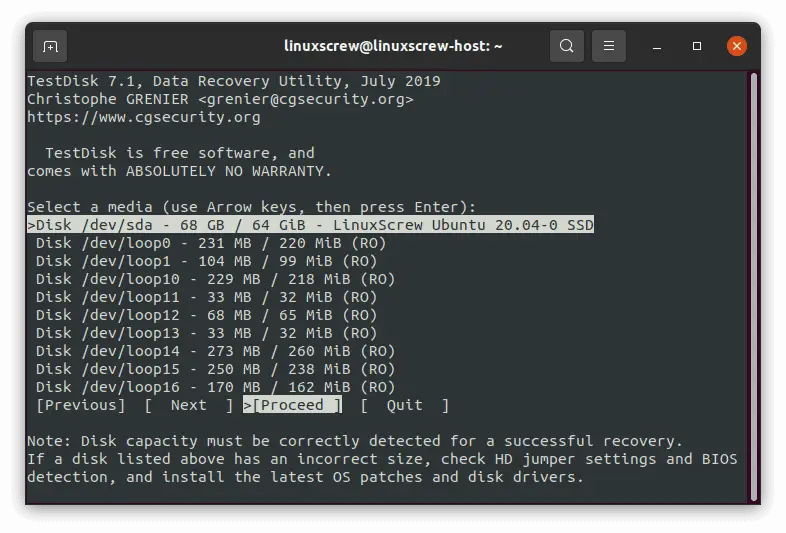
Select Recovery Media
Next, select the device containing the file system you wish to recover from. This will usually be /dev/sda, /dev/sdb, or something similar – not one of the loop devices:
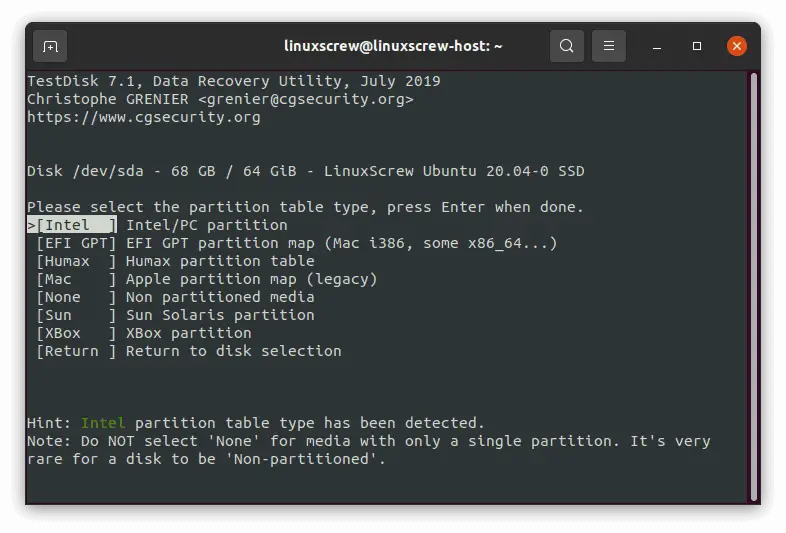
Select the partition table type – generally, go with the preselected default, but if you can’t find any files to recover, you may have to go back and choose the correct partition table and try again.
The partition table is an index of all of the files on a disk, so the computer knows where to find them – so if the wrong one is picked, the computer won’t know how to find files on the disk to recover them.
We’ve selected the disk and selected which partition table it uses – now we can recover some files.
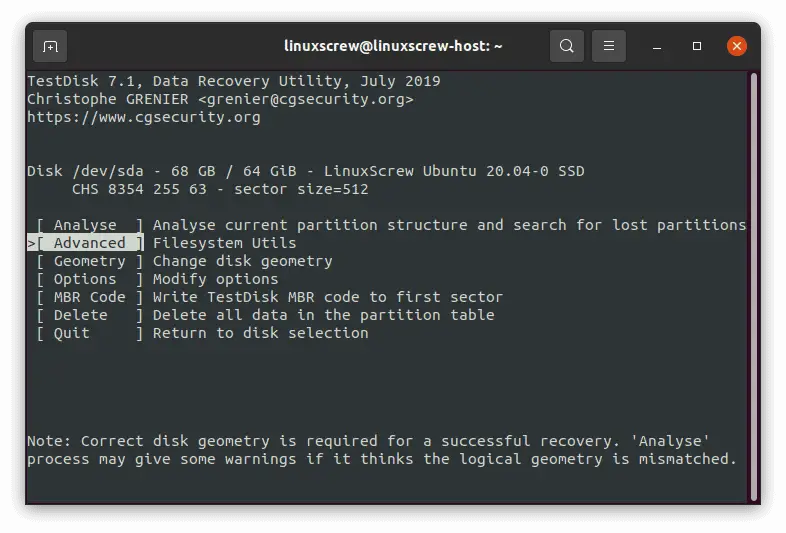
Select Advanced from the list of actions available in testdisk:
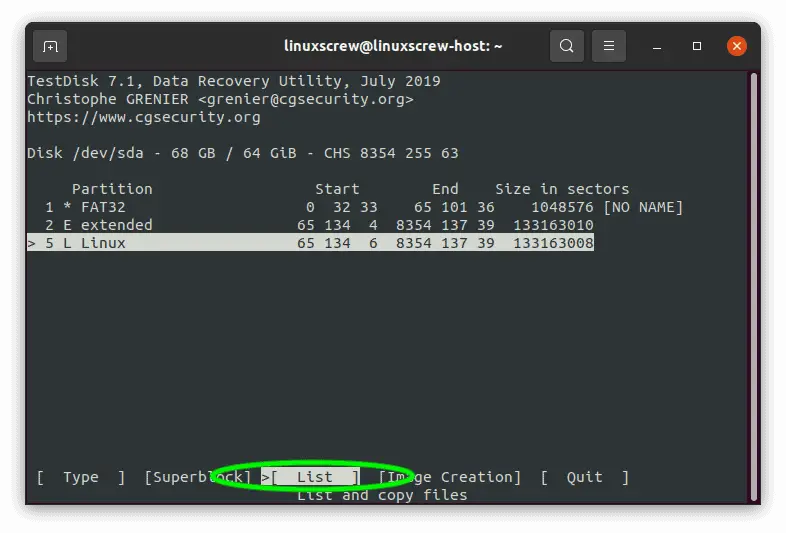
Use the arrow keys to navigate down to the partition/filesystem with the files you wish to recover.
You will need to make sure the List option is available on that disk (visible at the bottom of the screen) – if that option isn’t present, the contents of the disk can’t be listed, and you may need to return and select a different partition table.
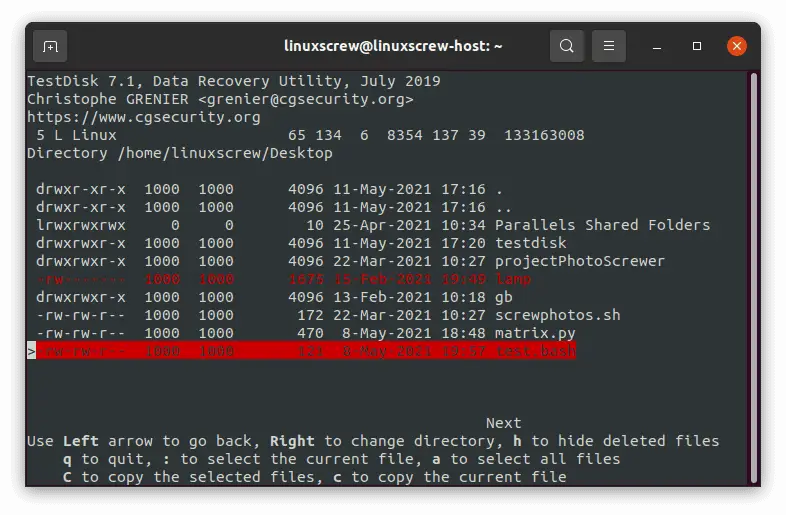
Use the arrow keys to navigate the folders on the drive. You’ll see deleted but recoverable files in RED.
If the file you are looking to recover isn’t in the folder where you accidentally deleted it from in red text, unfortunately, it’s probably gone for good.
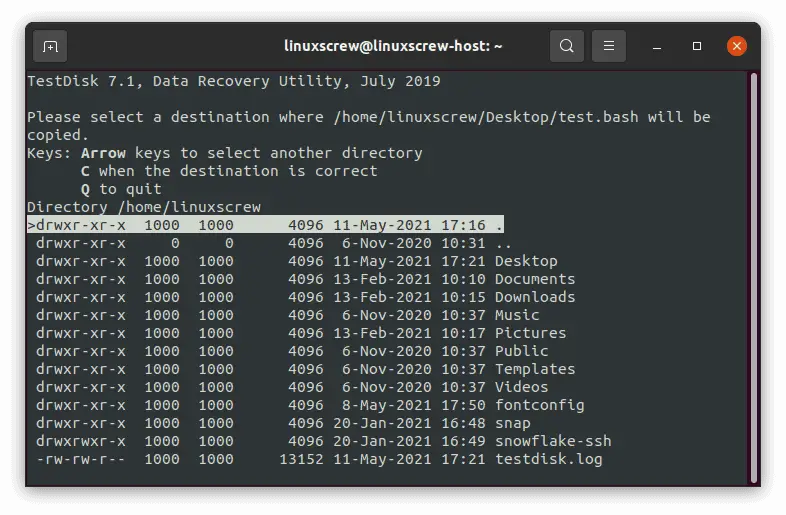
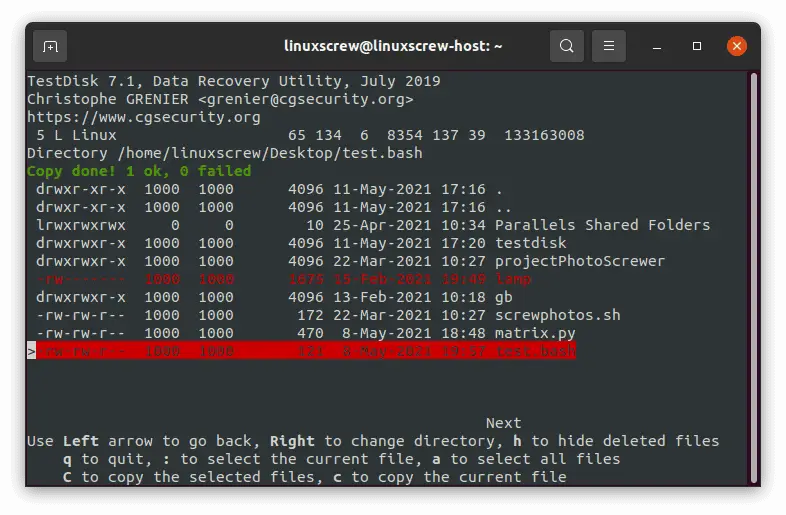
After selecting the destination to copy/recover the file to, you’ll get a nice confirmation message saying Copy done! to confirm.
If you’re recovering multiple files or large files, I recommend recovering to a USB stick or separate drive to the one you are recovering from – just so the recovery process doesn’t inadvertently overwrite any files yet to be recovered.
Backup
…Have you backed up yet?


