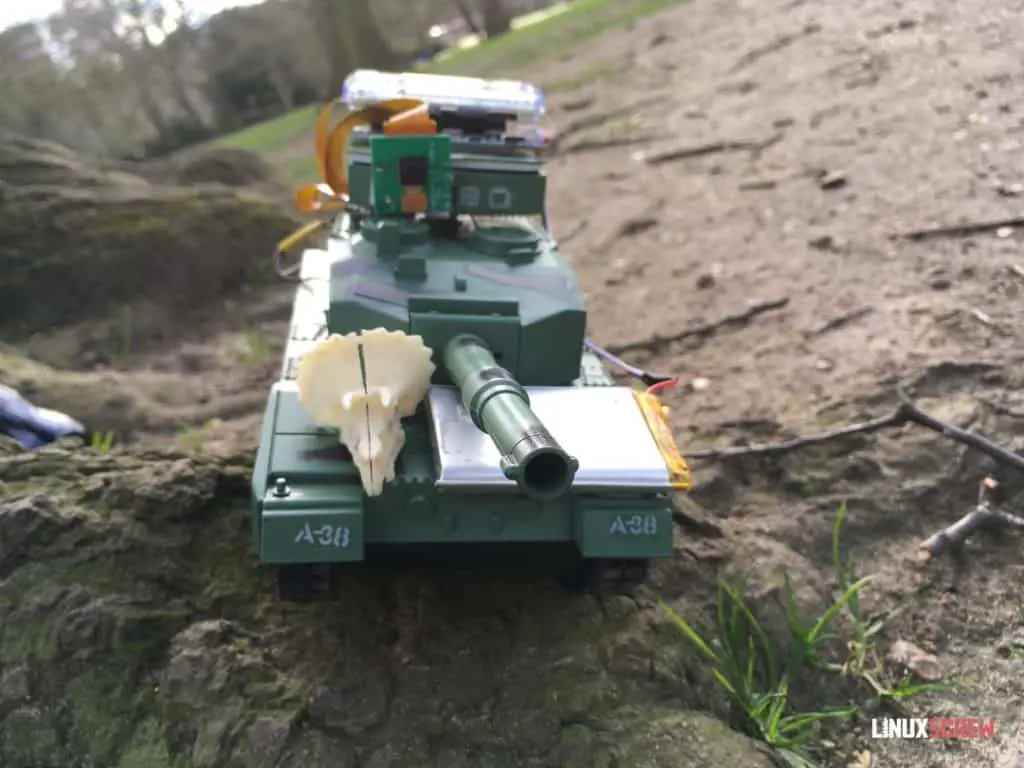
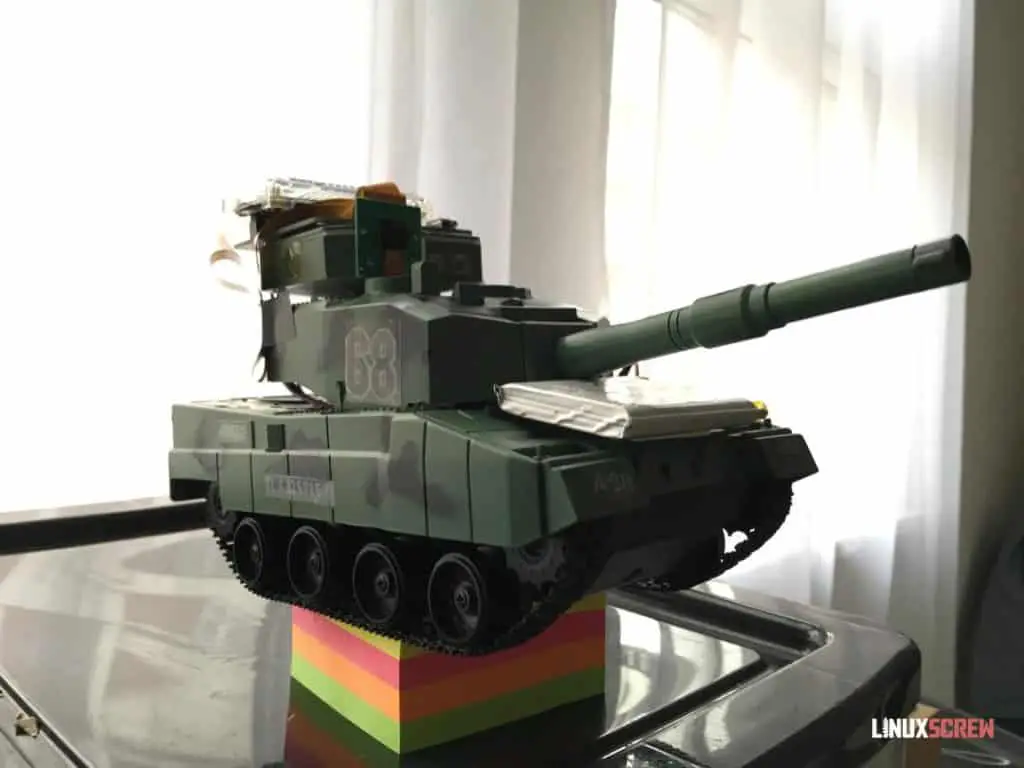
This was only meant to be a two-parter, but I couldn’t leave well enough alone.
Raspberry Pi & Python Powered Tank Part III is an update with better Python code and an improved design.
I’ve gone back to fix the biggest issues that were left after Part II. I’ve omitted a bit of the mucking about in this article to keep it focused on what worked.
How Did We Get Here?
If you haven’t yet checked out the full build process, here are the previous entries on LinuxScrew.com:
More projects:
- Smart Mirror
- Wikipedia Scraper
- Photo Resizer and watermarker
- Raspberry Pi Powered Palmtop/Laptop
- Raspberry-Pi augmented Apple Macintosh
The Gun

First things first, the gun now works!
It shoots these little guys. They get everywhere.
Circuitry
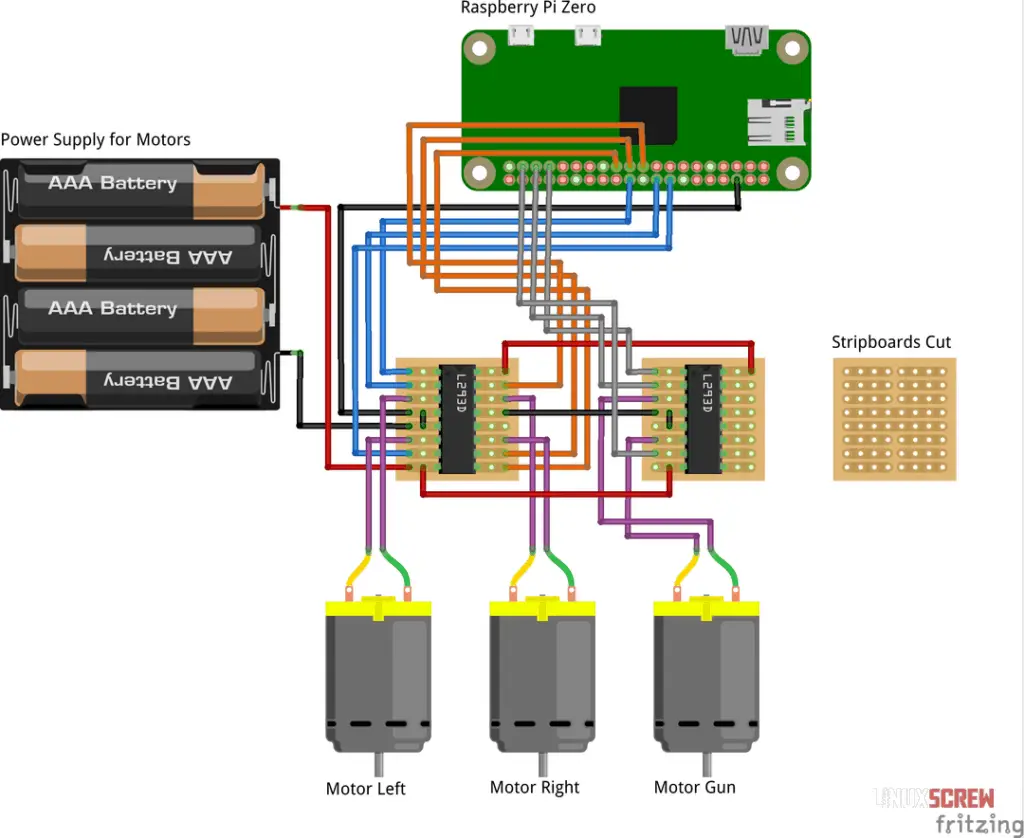
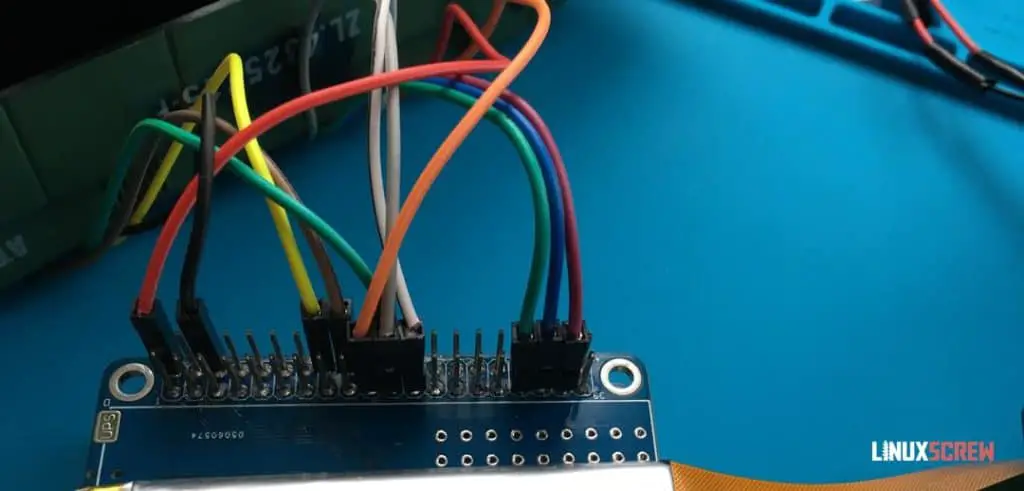
Here’s an improved look at what controls the motors: The pin numbers are listed in the code below.
Camera
Now using a piCamera!
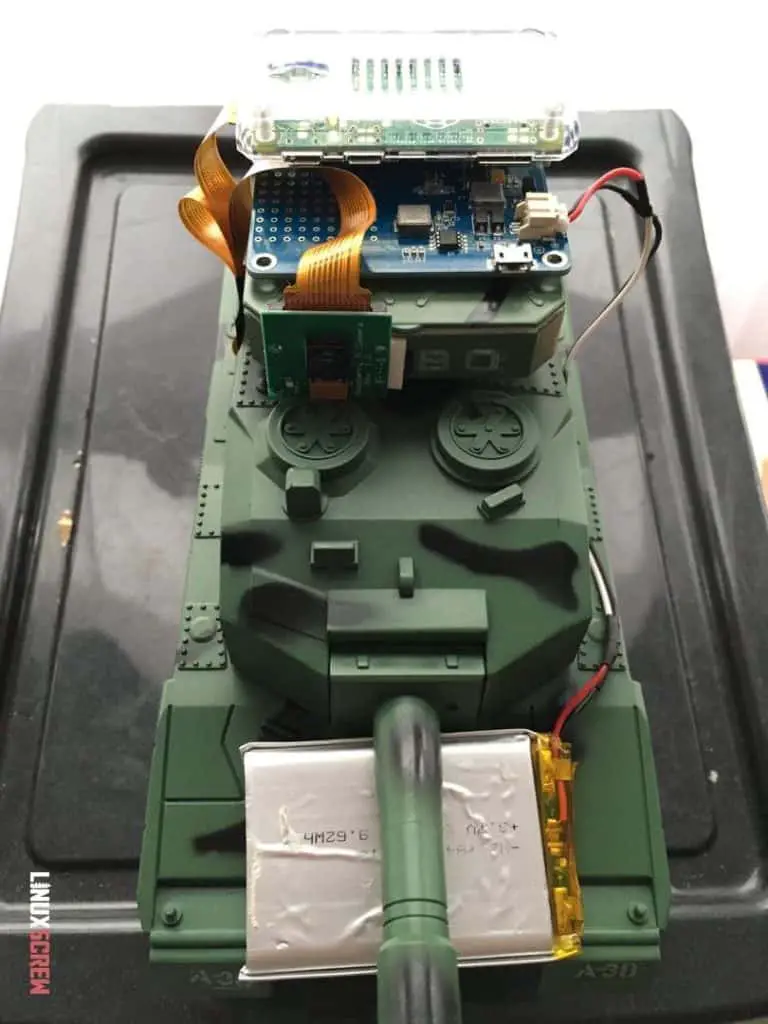
Enabling the PiCamera
The PiCamera needs to be enabled before it can be used. Done so by running:
sudo raspi-config
…and navigating to:
Interface Options -> Camera
…and enabling it.
Testing the PiCamera
To avoid much frustration, here’s how to test the camera BEFORE trying to write code to access it:
raspistill -o test.jpg
If you get a test.jpg file, your camera is working. If not, the ribbon cable probably isn’t attached correctly.
Note, if you set up your Raspberry Pi OS system on a Pi without a PiCamera slot and then move to one that has one, it won’t be detected.
Code Update
The L293D library I was using was kind of not great.
- It would throw errors when telling the motors to stop if already stopped
- It would only sometimes be able to run both motors simultaneously, even when threaded
So, I’ve rewritten the code to control the GPIO pins directly. It turns out it’s almost less code to do it this way than using the L293D library. Who knew.
New Dependencies
There are some new dependencies for the following code, installed below:
sudo apt install python3 python3-pip python3-opencv python3-rpi.gpio python3-flask python3-picamera
This includes the libraries for using either the PiCamera or a USB web camera with OpenCV.
The Code
# This script tested for use with Python 3
# This script starts a web server, so needs to be run as root or using sudo
# This application will be available by accessing http://<your raspberry pi ip address>:5000

from flask import Flask, Response, render_template
import cv2
import sys
import RPi.GPIO as GPIO
import io
import time
import picamera
import logging
import os

# Set up logging
logPath = os.path.dirname(os.path.abspath(__file__)) + 'https://cd.linuxscrew.com/pitank.log' # Makes sure the log goes in the directory the script is located in
print('Logging to ' + logPath)
logging.basicConfig(filename=logPath, level=logging.DEBUG)

# Initialise Flask, the Python web server package which serves all of this up to a browser
app = Flask(__name__)

# Define global variables for future use
# Some are initialized to None so that we can confirm they have been set up later

usbCamera = None
piCam = None

# GPIO Pins connected to LD293D chips
en1 = 22 # GPIO 25
in1 = 18 # GPIO 24
in2 = 16 # GPIO 23
# out1 to left motor
# out2 to left motor

en2 = 23 # GPIO 11
in3 = 21 # GPIO 9
in4 = 19 # GPIO 10
#out3 to right motor
#out4 to right motor

#Second l293d for GUN
g_en1 = 33 # GPIO 13
g_in1 = 35 # GPIO 19
g_in2 = 37 # GPIO 26
# out1 to gun motor
# out2 to gun motor

# Use BOARD pin numbering - ie the position of the pin, not the GPIO number. This is a matter of preference.
GPIO.setmode(GPIO.BOARD)

# Link to Pi Zero pinout
# https://i.stack.imgur.com/yHddo.png

# Setup to set up camera, motors

GPIO.setup(in1, GPIO.OUT)
GPIO.setup(in2, GPIO.OUT)
GPIO.setup(en1, GPIO.OUT)

GPIO.setup(in3, GPIO.OUT)
GPIO.setup(in4, GPIO.OUT)
GPIO.setup(en2, GPIO.OUT)

GPIO.setup(g_en1, GPIO.OUT)
GPIO.setup(g_in1, GPIO.OUT)
GPIO.setup(g_in2, GPIO.OUT)

# Initialise CV2 with the first available USB camera, if one is being used
# No need to comment out if not in use, it doesn't throw an error if no camera is present
usbCamera = cv2.VideoCapture(0)

# PiCamera configuration
# Values chosen to maximise refresh rate on the network
framerate = 10
res = (1024, 568)
rotation = 180
quality = 80

# Initialise PiCamera
# Be sure to comment this line out if no PiCamera is present or an error is thrown
piCam = picamera.PiCamera(framerate=framerate, resolution=res)

time.sleep(2)  # Let the camera warm up

# If camera is mounted upside down or sideways, rotate the video feed
if piCam:
    piCam.rotation = rotation

# Cleanup function to release the camera and GPIO pins ready for the next time
def cleanup():

    print('Done, cleaning up video and GPIO')
    GPIO.cleanup()
    usbCamera.release()
    cv2.destroyAllWindows()
    sys.exit("Cleaned up") # Make sure the application exits after a cleanup in case it was called due to an error

# Function to generate frames from the USB camera using the cv2 library
def generateUsbCameraFrames():  # generate frame by frame from camera

    # Ensure the global camera variable is used in this scope
    global usbCamera

    # Only try to generate frames if the camera variable has been populated
    if usbCamera:
        while True:
            # Capture frame
            success, frame = usbCamera.read()  # Reads the camera frame
            if not success:
                break
            else:
                ret, buffer = cv2.imencode('.jpg', frame)
                frame = buffer.tobytes()
                yield (b'--frame\r\n'
                    b'Content-Type: image/jpeg\r\n\r\n' + frame + b'\r\n')  # Concat frame one by one and show result

# Function to generate frames from an attached PiCamera
def generatePiCameraFrames():

    global piCam
    global quality

    if piCam:
        while True:
            try:
                image = io.BytesIO()
                piCam.capture(image, 'jpeg', quality=quality, use_video_port=True)
                frame = image.getvalue()

                yield (b'--frame\r\n'
                    b'Content-Type: image/jpeg\r\n\r\n' + frame + b'\r\n')  # Concat frame one by one and show result
            except:
                 break

# @app.route decorators tell flask which functions return HTML pages

# Video streaming route - should output the live video stream
@app.route('/video_feed')
def video_feed():
    # Comment out the video capture method you're not using
    #return Response(generateUsbCameraFrames(), mimetype='multipart/x-mixed-replace; boundary=frame')
    return Response(generatePiCameraFrames(), mimetype='multipart/x-mixed-replace; boundary=frame')

# Main/index route - the page that loads when you access the app via a browser
@app.route('/')
def index():
    return render_template('index.html') # Ensure that index.html exists in the templates subdirectory for this to work

# Control routes - these routes will be hit when the related link is pressed from index.html

@app.route('/control_stop')
def control_stop():

    # Ensure the global GPIO variables are used in this scope
    global en1
    global in1
    global in2
    global en2
    global in3
    global in4

    # Stop
    GPIO.output(en1,GPIO.LOW)
    GPIO.output(en2,GPIO.LOW)

    # Return an empty (successful) response regardless of what happened above
    return Response("", mimetype='text/plain')

@app.route('/control_forward')
def control_forward():

    # Ensure the global GPIO variables are used in this scope
    global en1
    global in1
    global in2
    global en2
    global in3
    global in4

    # Left Motor Forward
    GPIO.output(in1, GPIO.HIGH)
    GPIO.output(in2, GPIO.LOW)
    GPIO.output(en1, GPIO.HIGH)

    # Right Motor Forward
    GPIO.output(in3, GPIO.HIGH)
    GPIO.output(in4, GPIO.LOW)
    GPIO.output(en2, GPIO.HIGH)

    return Response("", mimetype='text/plain')

@app.route('/control_back')
def control_back():

    # Ensure the global GPIO variables are used in this scope
    global en1
    global in1
    global in2
    global en2
    global in3
    global in4

    # Left Motor Back
    GPIO.output(in1,GPIO.LOW)
    GPIO.output(in2,GPIO.HIGH)
    GPIO.output(en1,GPIO.HIGH)

    # Right Motor Back
    GPIO.output(in3,GPIO.LOW)
    GPIO.output(in4,GPIO.HIGH)
    GPIO.output(en2,GPIO.HIGH)

    return Response("", mimetype='text/plain')

@app.route('/control_turn_right')
def control_turn_right():

    # Ensure the global GPIO variables are used in this scope
    global en1
    global in1
    global in2
    global en2
    global in3
    global in4

    # Left Motor Forward
    GPIO.output(in1, GPIO.HIGH)
    GPIO.output(in2, GPIO.LOW)
    GPIO.output(en1, GPIO.HIGH)

    # Right Motor Back
    GPIO.output(in3,GPIO.LOW)
    GPIO.output(in4,GPIO.HIGH)
    GPIO.output(en2,GPIO.HIGH)

    return Response("", mimetype='text/plain')

@app.route('/control_turn_left')
def control_turn_left():

    # Ensure the global GPIO variables are used in this scope
    global en1
    global in1
    global in2
    global en2
    global in3
    global in4

    # Left Motor Back
    GPIO.output(in1,GPIO.LOW)
    GPIO.output(in2,GPIO.HIGH)
    GPIO.output(en1,GPIO.HIGH)

    # Right Motor Forward
    GPIO.output(in3, GPIO.HIGH)
    GPIO.output(in4, GPIO.LOW)
    GPIO.output(en2, GPIO.HIGH)

    return Response("", mimetype='text/plain')

@app.route('/control_fire')
def control_fire():

    global g_en1
    global g_in1
    global g_in2

    # Gun Motor Forward
    GPIO.output(g_in1, GPIO.HIGH)
    GPIO.output(g_in2, GPIO.LOW)
    GPIO.output(g_en1, GPIO.HIGH)

    # Fire the gun for 2 seconds to get some shots off
    time.sleep(2)

    # Stop
    GPIO.output(g_en1,GPIO.LOW)

    return Response("", mimetype='text/plain')

# Launch the Flask web server when this script is executed
# Catch KeyboardInterrupt so that if the application is quitting, cleanup can be run
try:

    if __name__ == '__main__': # If the script is being run directly rather than called by another script

        # Start the flask app!
        app.run(host='0.0.0.0', port=5000, debug=True, use_reloader=False)
        # App is run WITHOUT threading to reduce the chance of camera/GPIO conflict - only one concurrent user is expected, so this is fine
        # Debug is enabled so we can see what's happening in the console
        # However, the app automatically reloads when debug=True, which causes camera/GPIO conflicts, so this is disabled with use_reloader=false
        # This application will be available by accessing http://<your raspberry pi ip address>:5000

except KeyboardInterrupt:

    pass

finally:

    # Ensure cleanup on exit
    cleanup()

# End of file!
You’ll also need the following in the file index.html in a folder called templates:
<!doctype html>
<html lang="en">
<head>

    <meta charset="utf-8">
    <meta name="viewport" content="width=device-width, initial-scale=1, shrink-to-fit=no">

    <title>PyTank!</title>


    <style>

         html, body{
             width: 100%;
             height: 100%;
             margin: 0;
             padding: 0;
             background-color: #000;
         }
         .feed {
             width: 100%;
             height: 100%;
           object-fit: contain;
         }

         .nav {
             opacity: 0.75;
             font-size: 5em;
             max-width: 100%;
             position: absolute;
             bottom: 5px;
             right: 5px;
         }
         a {
         	text-decoration: none;
         }

    </style>

</head>
<body>

    <img class="feed" src="{{ url_for('video_feed') }}">

    <div class="nav">

        <a href="#" onclick="fetch('{{ url_for('control_forward') }}')">F</a>
        <a href="#" onclick="fetch('{{ url_for('control_back') }}')">B</a>
        <a href="#" onclick="fetch('{{ url_for('control_turn_left') }}')">L</a>
        <a href="#" onclick="fetch('{{ url_for('control_turn_right') }}')">R</a>
        <a href="#" onclick="fetch('{{ url_for('control_stop') }}')">S</a>
        <a href="#" onclick="fetch('{{ url_for('control_fire') }}')">G</a>

    </div>

</body>
</html>
The code editor here can’t handle emoji – replace the link text for those last HTML links with emoji of your choice for pretty control buttons.
Starting the Remote Control Server on Boot
To start up the remote control interface on boot rather than having to SSH into the pi, add it to the root crontab by running:
sudo crontab -e
And adding this line to the end:
@reboot python3 /home/pi/pitank/tank_remote.py
This will start the server every time the Pi boots – just make sure the path at the end of the line points to your python file.
WiFi
I was going to set up the Pi as a wifi hot spot so that a tablet or phone could connect to it for remote control, but it would cause more trouble than it’s worth as it means the Pi would no longer have internet access for updating the software (Or running an IRC server from a tank because why not).
Instead, I’ve enabled the WiFi hotspot on my phone and set up the Pi to connect to that. Road warrior!
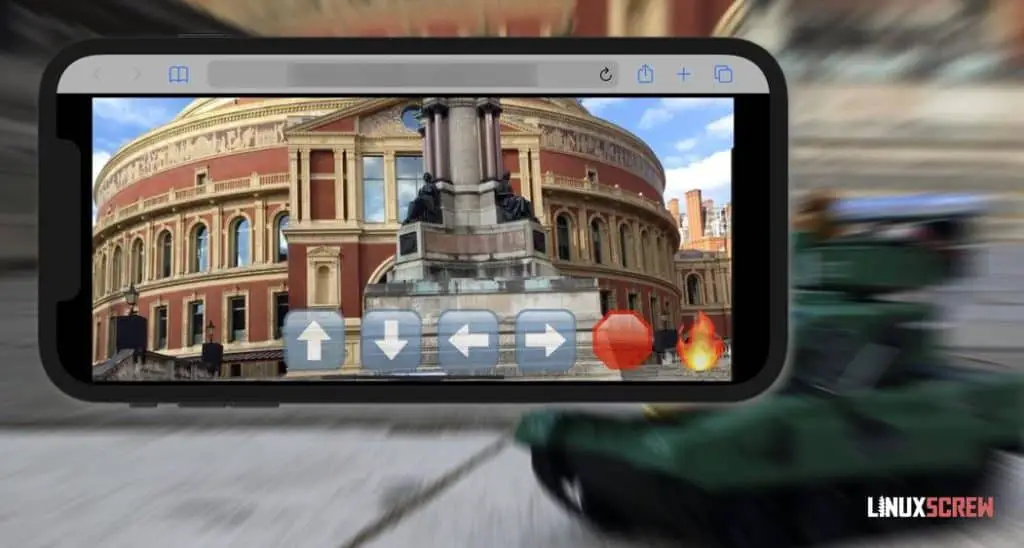
New Interface
Here’s what the new interface looks like:
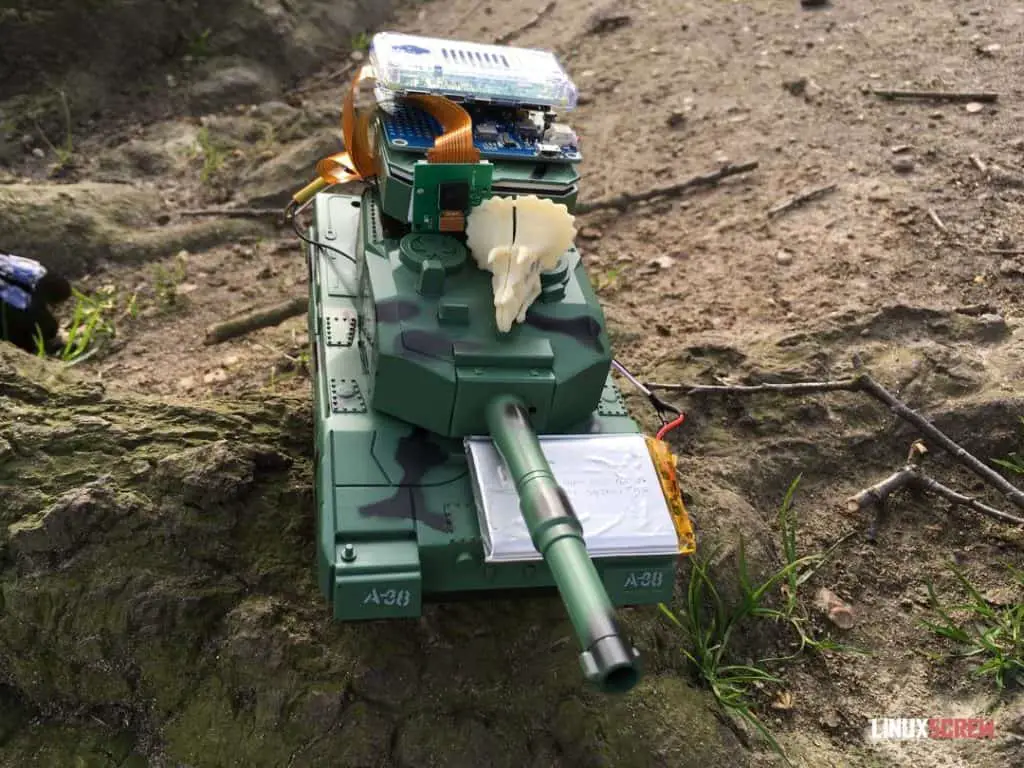
In the Field
Misc Notes
- The PiCamera is laggier than using a webcam but much lighter. Choose one based on your preference (or if you have a better RC vehicle that can tow more weight)
- Due to this and the general slowness of the PiZero (encoding and transmitting the image takes time), video responsiveness wasn’t a priority – code simplicity was.
- If you were building something really fancy, you could send the video feed over its own radio channel with faster hardware or something.
- With this in mind, you could always modify the code so the tank only moves a set distance on each command so it can’t run away.
- If you have a better, faster (but still simple! no big includes – people need to understand what they’re coding when following this!) way to stream the vid, let me know!
- This tank is still the ULTIMATE DESTROYER OF AA BATTERIES.
- If another client visits the remote control web page, the feed on the first stops. This is OK; I only expect one user at a time.
- I’ve left the Flask server running with the video feed open in a browser for a while, and it doesn’t seem to crash, which is nice.
More
Here are some of my previous projects for LinuxScrew:
- Smart Mirror
- Wikipedia Scraper
- Photo Resizer and watermarker
- Raspberry Pi Powered Palmtop/Laptop
- Raspberry-Pi augmented Apple Macintosh
- Arduino Powered Extraction Fan
I’ve got more junk, more ideas (Roboduck…), and lots more solder to burn through, so follow LinuxScrew and myself on Twitter if you’re keen for more attempts to put computers inside of things.
